Clearwater LED Lights
[ Monday - November
30, 2009 ]
If I have HID lights already then why in the world would I consider
investing even more money on LED lights? Is it because the HID
lights aren't bright enough? Hardly. In fact it's the total
opposite. The HIDs are too bright for city use. Why don't I
mount it
lower? Because I really can't. Taking the light an inch
lower would have the HID lights over powering the turn signals. I
can't mount it on the fork because these are inverted forks and there
is a mudguard/fender that travels up and down the fork. A max of
9 inches to be exact. What about mounting the lights on my engine
guard? I can just picture in my little head the lights
getting crushed
when the 8GS is taking a dirt nap. Uh... no. That's not a
good location also. Sigh... there is
no other place to mount the lights other than where they are right
now. In the end it is where it's suppose to be. Of course
it doesn't help the matter at all. As a result of all this, I'm
researching for alternative lights that might better serve as running
lights. I think I've found them: Clearwater LED Lights
At $475 from Pashnit.com,
on
top
of the shipping and the freakin' hiked up CA sales tax, the
total comes to a whoppin' $514. Ouch, that's steep. At this
price I'm banking on "You get what you pay for." The good news is
the review of these LED lights on WebBikeWorld
did a good job of convincing me that the lights are what they claim to
be.
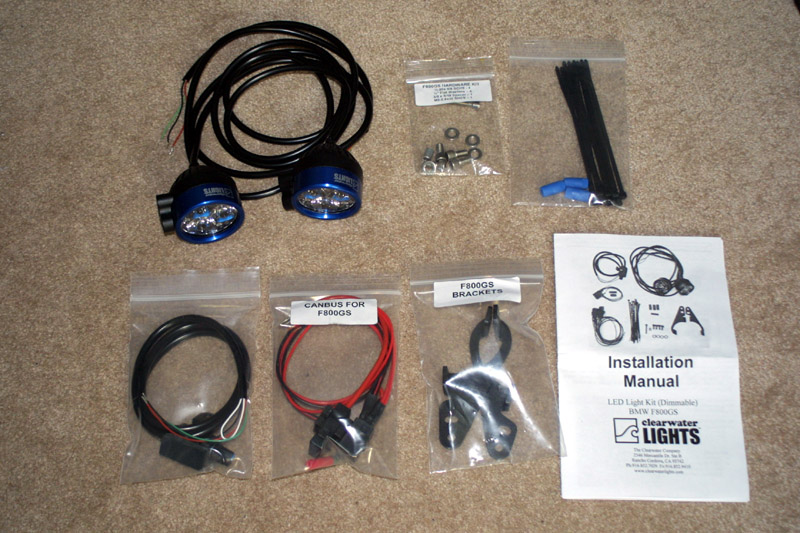
The complete kit.
Now it's just a matter of figuring out how to hook up the lights using
my
accessory power setup (e.g. Centech AP-1).
Oh,
the
other thing that
convinced me of these lights is the variable intensity settings for the
lights. Way cool!
[ Sunday - December
6, 2009 ]
It's finally time to put the lights on the bike. I've
procrastinated enough and the days are getting dark sooner. I
start the
day by cleaning up the wiring for the existing HID lights. When I
first hooked everything up, I did a quicky job (because Death Valley
'09
was just around the corner) just to get some brights lights for the
Hwy. I didn't have time to open the bike
up and beautify the setup. Suffice to say, the wiring was a
mess. Now it's all
cleaned up and everything looks clean and tucked away.

Check out the high tech way of holding the HID lights on when there are
no
screws.

It's much better to route the wiring underneath the fake tank / air box.
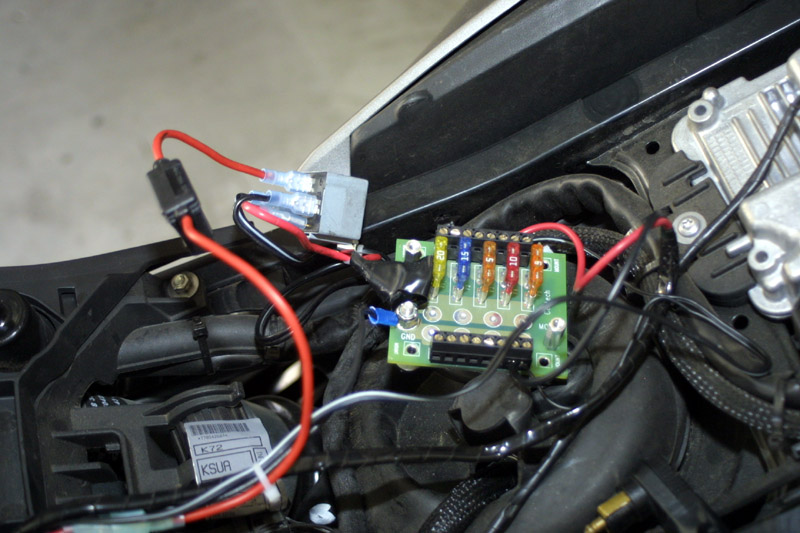
Yup the AP-1 is going to stay right where it is. Under the
seat. It's easier to get to the fuses.
Now I don't know whether it's my impatience, due to old age, or whether
the instructions for the Clearwater LED lights are terrible. I
think it's a combination of both. I had to read the directions at
least 5 times, in addition to contacting the folks at Clearwater
Lights,
before finally understanding what I have to do. Maybe it's
because I'm dense. I don't know. Nonetheless, I figured it
out. Here is what I did. BTW, since I have the AP-1 already
connect and controlled via a relay, I didn't have to hook up the relay
that came with the Clearwater lights. If you don't have a similar
setup, you'll have to use the Clearwater Lights supplied relay.
Mounting the lights is very simple. It's just a matter of
deciding how much vertical and lateral angle you need. The
mounting process is very intuitive so I won't bother with the details
here. It's figuring out the electronics that's the
confusing part. The fact that the instructions are in black and
white doesn't help the matter much. The provided diagram really
needs to be in color. Unfortunately, it's not.
Running the wiring for the lights is also not a big deal. Once
again it's a
matter of deciding how much slack you think you need for the wheel
travel. I've left enough slack to the wire that even if I go
airborne, god forbid, it shouldn't cause a problem with the
wiring. On the left fork, I just run the wire straight up the
side. On the right fork, I run the wire up the fork, and detour
the wire right along with the break line. I also make sure not to
disturb the ABS wire in any way. It's better to be safe than
having ABS faults.
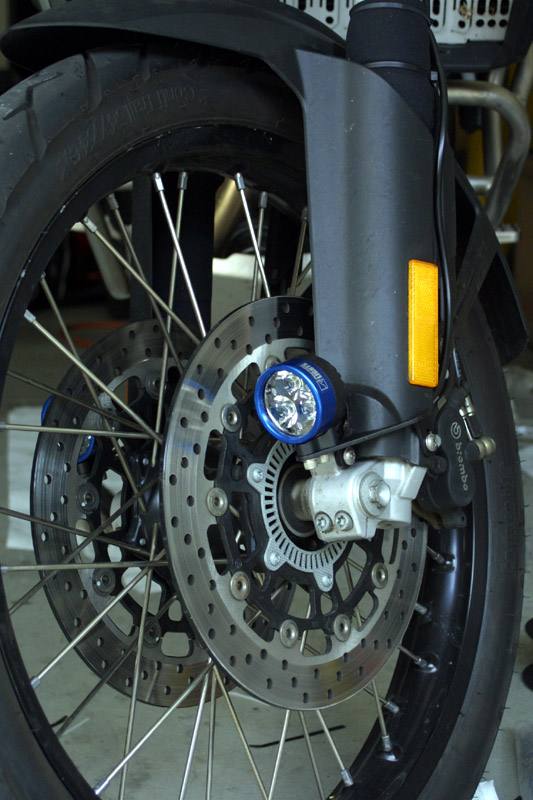
The wiring runs underneath the fork guard.

Straight up the left fork.
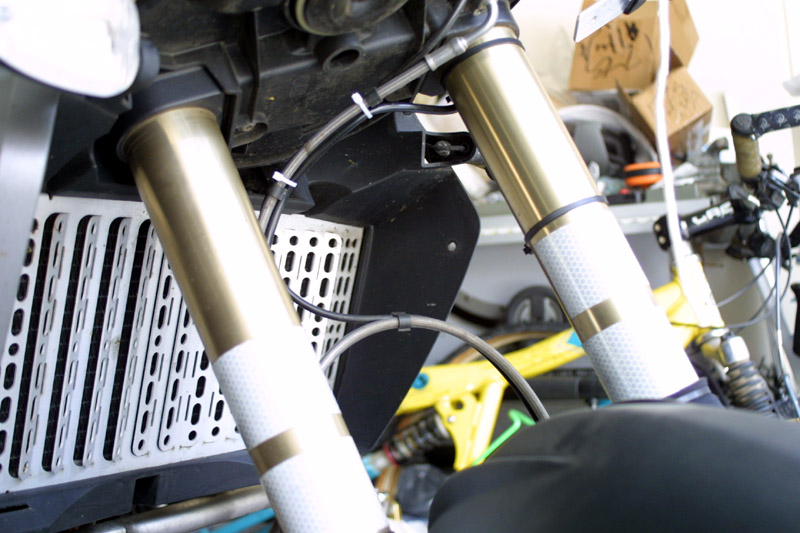
Follow the brake line and split off to the back of the fork.

The right light's wire runs in the grove where the ABS wire would be.
(There is no ABS sensor on the right side of the wheel)

Both lights installed and wired.
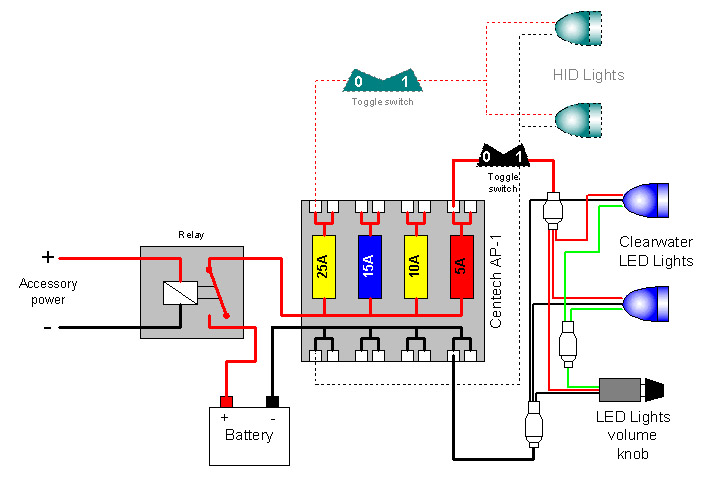
Now for the tricky part ... the electronics. In reality, it's not
really that tricky. All you have to understand is that all three
green
wires, combined together, is used to determine the lights' dimming
factor via the kit's provided light volume knob. If you wire the
lights without using the green wires, the light will simply be on at
full power all the time.
Instead of showing the jumble of wires on the bike, I'm just going to
show a schematic of how the lights should be connected. Hopefully
this will also eliminate any confusion regarding the lack of colors in
the original instructions.
There is an alternate method of hooking the volume control knob via a
second relay and the low beam power. That's fine and all, but I
just
don't feel comfortable tapping off of that power source, even for a
relay. So I kept things simple. Power switch and volume
control knob.
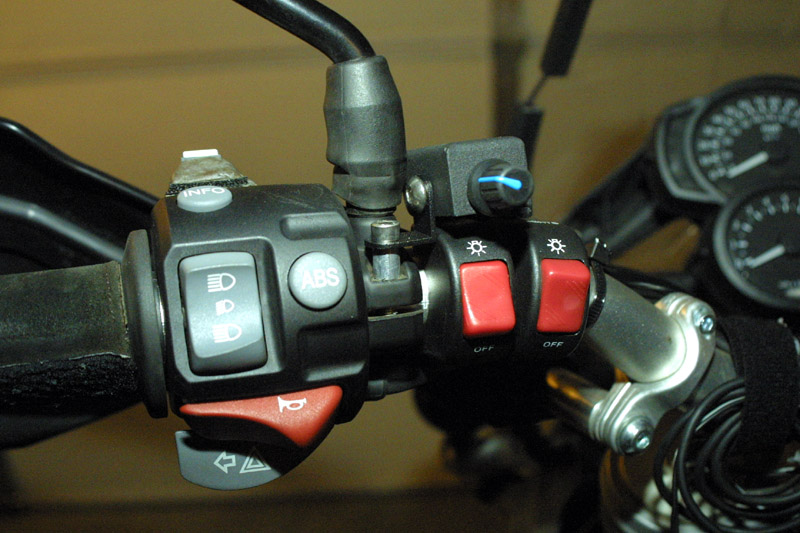
Left, LED with volume knob above it. Right, HID lights.
So here it is, connected and all. The lights are very bright, but
they're not bright enough to be a hazard like the HID lights. As
a result, they will work fine for city driving.

I drilled a small hole in the fork guard and zip tied the wire to
eliminate too much slack.
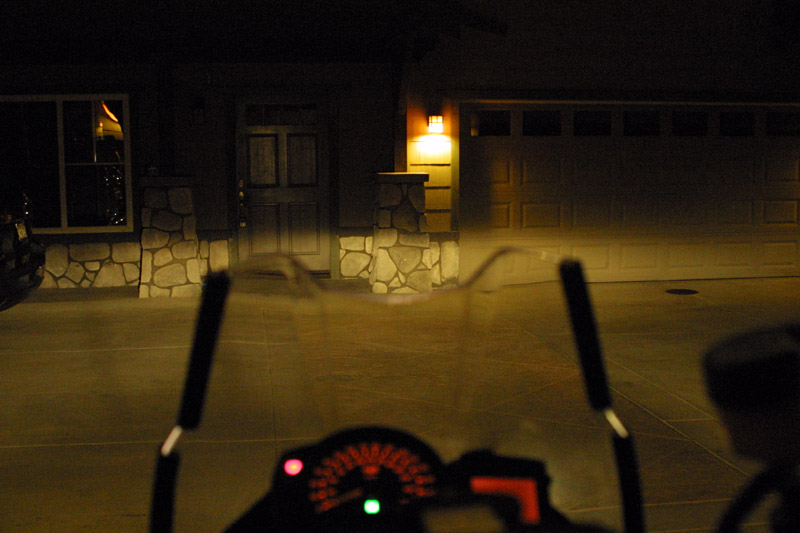
Philips Vision Plus. Still pretty good.
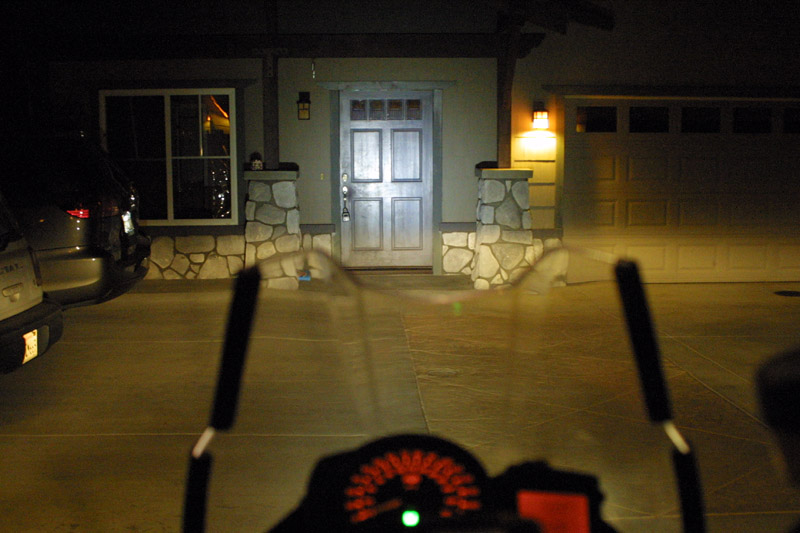
Clearwater LED Lights at full blast. It definitely improves the
situation.
Last but not least, look
at the blinding white light of the HID lights below. There's no
comparison between the HID and the LED lights. However, it's
obvious that I can't use the HID lights in the city.
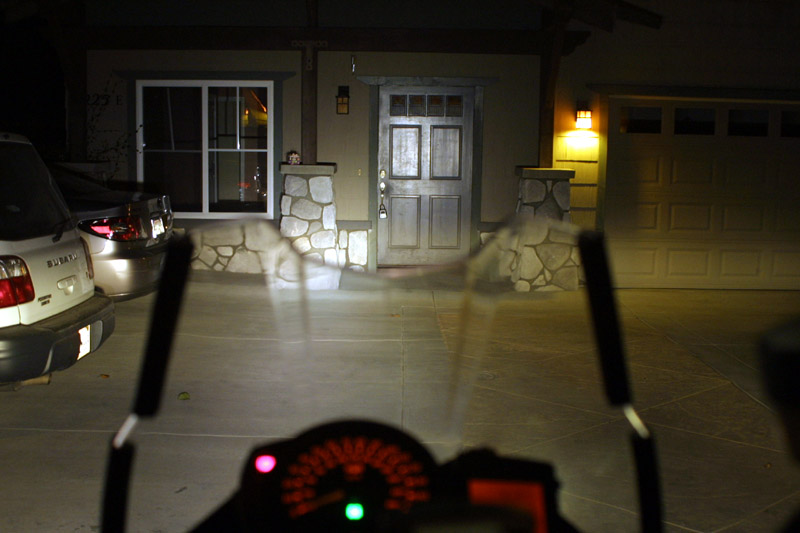
Look how bright this is compared to the image above.
It appears the LED lights will work fine at
50%. At 100%, the lights are still quite blinding. Is it
worth the $514? In terms of brightness, yes. Now we'll see
how it stacks up during the commute.
[ Tuesday -
December 8, 2009 ]
It's been two days of commuting in both early morning light and at
almost pitch black evening. What do I think of the LED
lights? Very nice. Very nice indeed. Their adjust
ability makes the lights really useful. It definitely improves
the night riding and also make people notice that I'm not a one eyed
car. When I need more light, it's just a matter of cranking the
knob a little bit more. I've found that 60% is more reasonable
than 50%. The fact that it's adjustable on the fly just makes it
oh so nice. When I'm finally by myself and there are no cars
around, 100% is awesome. Still not as powerful as the HID lights,
but that is exactly what I wanted.
How do I rate the lights? Overall, 4.9 out of 5. Why is it
missing the .1? The instructions kind of stinks... a bit.
If the instructions are improved, a definite 5 of 5. Please
improve the directions Clearwater Lights. That way more dense
folks like me would have less problems and you're more likely to sell
more units. The lights by themselves, their construction, and the
ease of operations is a definite 5 out of 5. Simply holding the
lights in your hands, you can see and feel the quality of the
workmanship. For the three of us... me, myself and I, it's money
well spent.
BTW, WebBikeWorld
has installation instructions for installing the Clearwater
LED Lights on a Ducati Multistrada. The last time I looked at
the instructions, it was a bit overwhelming. I don't know if it's
because I'm impatient or if it just looks nasty/scary with all those
wires going all over the place. As the article puts it, "...I
ended up with a more organized mess...". Have
a look for yourself. The article is really good though.
I ended up skipping to the very end to read the summary. I made
my decision on the LED lights based on that summary.
Written on: November 30, 2009
Last modified: December 8, 2009