Adapting BMW armor for non-BMW clothing.
BMW Rally 2 Pro pants overly abused.
[ Friday - December
19, 2008]
As much as I dread writing this article, it is true. My BMW Rally
2 Pro pants are reaching the end of its life. I've only had the
pants for a little over two years, but the abuse of using the suit for
every activity, from commuting to long trips, have taken it's toll on
the pants. Having paid $450 for the pants, I was hoping they
would last longer than 2+ years, but that's not the case. I have
the option of getting another pair of pants, but I can't bring myself
to spend another $450 for just another two years. However, there
are things associated with the BMW Rally 2 Pro setup that I don't want
to lose when going with another vendor's clothing. What could I
want from the BMW's clothing that no other manufacturer can
provide? Why the CE2+ armor. The BMW NP armor is far
superior to any other type of motorcycle armor on the market as of this
witting. If you say, "It's can't be superior to hard
armor." I say, "Yes it can." It's superior to hard armor in
the sense that it delays the transfer of energy from the point of
impact to the wearer. Hard armor has a delay of only one
milisecond
where as the BMW's NP armor will delay up to 5 miliseconds before the
impact energy is felt by the wearer. I've even performed my own
simple test
on an old set of NP armor just for kicks before I threw them into the
trash.
My test consisted of dropping a pair of titanium scissors at 6' into
the NP armor. The drop test resulted in the scissors bouncing off
of the armor without so much as a scratch on the NP armor. The
second test I did was to grab the titanium scissors and stabbing the NP
armor as fast a I can. This gives a little more force than
just the weight of the scissors. The result? The scissors
penetrated the armor about 1/16" before bouncing right off the
armor. There was still at least another 3/4" to get to the other
side of the armor. To say the least, I was thoroughly
impressed. BMW is definitely not trying to pull the wool over my
face with the claims that the Rally 2 Pro armor is
superior to CE Level 2. Do you question my results? If so,
you can perform this test for yourself. Call up a BMW Motorrad
dealer and order one piece of armor for a Rally 2 Pro suit and test it
for yourself. For the most part all Rally 2 Pro armor pieces,
regardless of size, runs around $20 each. Brown Motor Works in
Pomona, CA gave me a deal for the armor at $14 a pop. If you're
not impressed after your own test, then you might
want to consider calling up the defense industry and acquire yourself
some ceramic boron Kevlar armor for your motorcycle gear. In this
way you'll be bullet proof also. However, ceramic boron Kevlar
armor is only good for about 2-3 high velocity slugs.
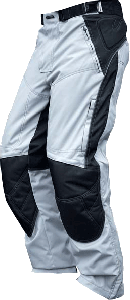
Enough rambling. I found myself looking at and then purchasing
the Fieldsheer Mercury pants as a replacement for the Rally 2 Pro
pants. At $150 for the pants, I can't complain.
Fieldsheer Mercury pants
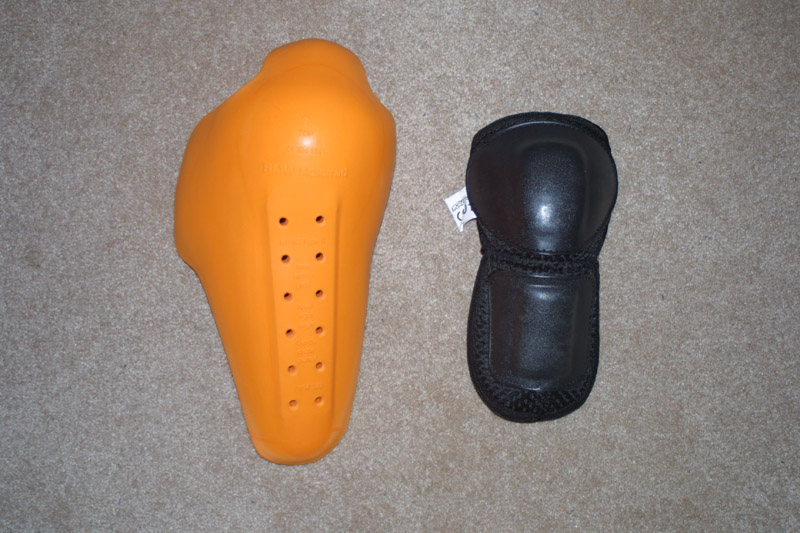
As for the armor that comes with the Mercury pants, I discarded
them. Perhaps I'll use the armor if I ever get back into mountain
biking.
Look at the difference between the BMW NP armor compared to the
Fieldsheer CE armor.
First thoughts on the Mercury pants? It's definitely no Rally 2
Pro, but it will be more than sufficient for my purposes. The
only requirement now is to have a good set of armor in the pants.
In other words, time to adapt the BMW NP armor to the Mercury
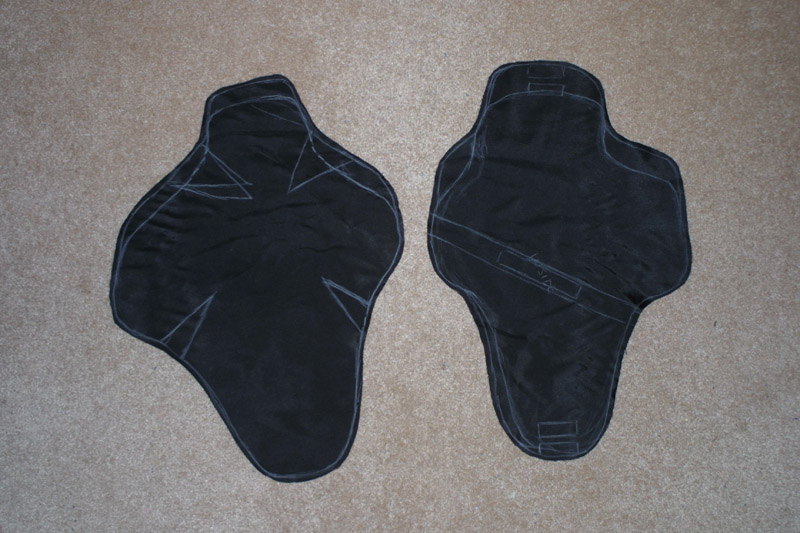
pants. I started the process by creating pockets that the BMW NP
armor can be placed into. I took my existing BMW NP armor from
the Rally 2 Pro pants and created stencils that I later traced and cut
out of fabric.
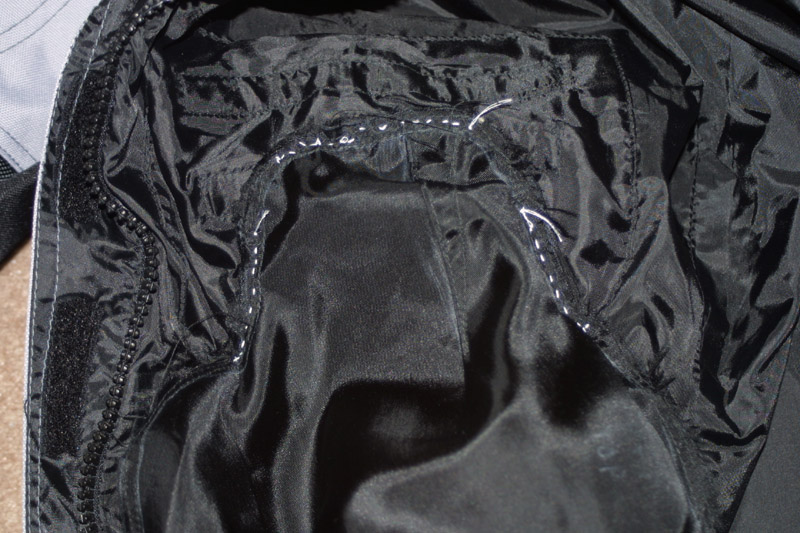
Stencil pattern for the BMW NP armor pocket.
Next it's just a matter of sewing the front and back side of the
pocket. The triangular shapes on the front pattern indicate where
the fabric is folded together to allow for better cradling of the NP
armor. The back part has to be split into the top an bottom parts
to allow for the addition of Velcro fasteners. The two stencil
shape above are not ideal as they're not a perfect match for one
another. If I do come up with better stencil patterns, I will
post them later in this article. I'm sure I'll be making more BMW
NP armor pockets in the future. With a lot of coercion, the three
parts are put together and then sewn into the Mercury plant liner.
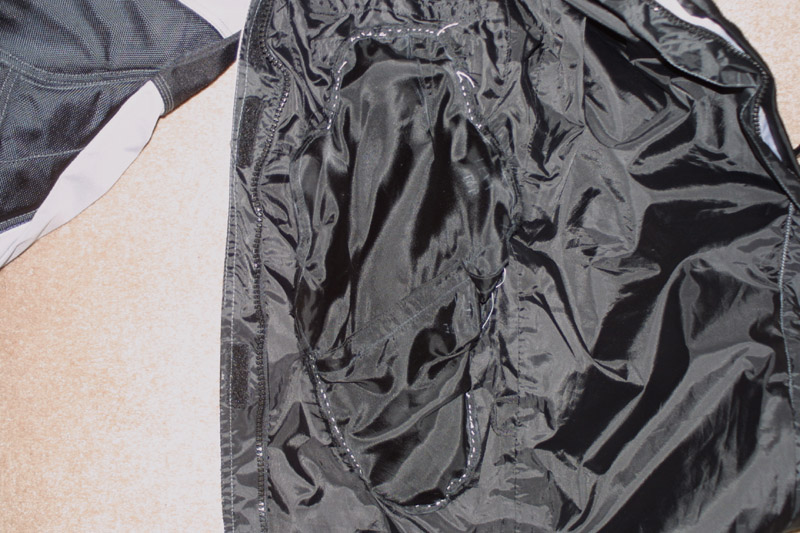
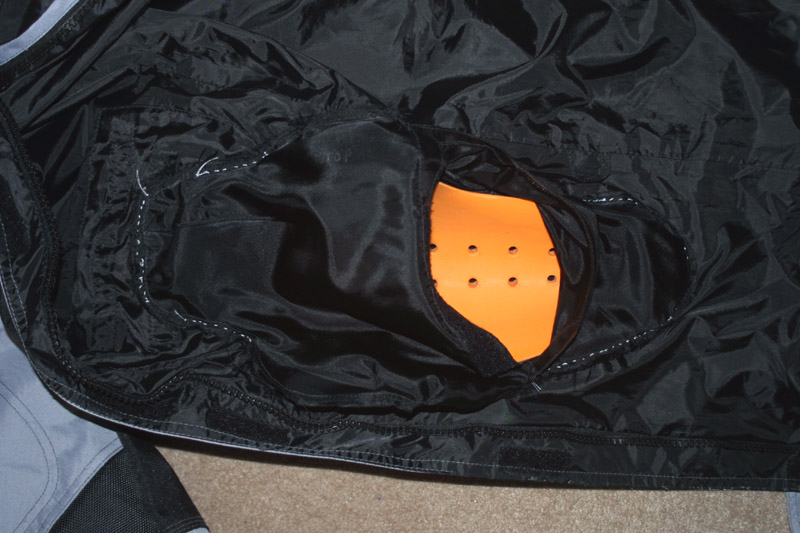
The NP pocket is sewn into the liner by hand.
Here's how the NP pocket looks with the back open and the BMW NP armor
inside.
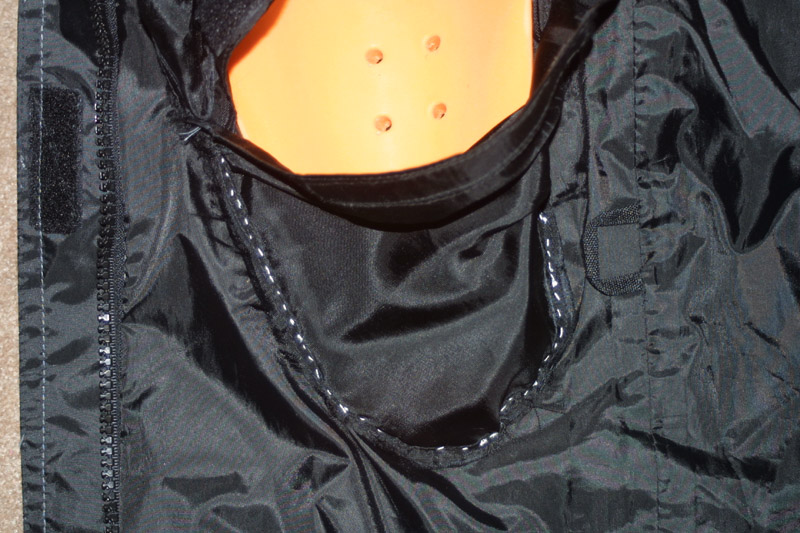
A closer look at the pocket sewn into the pant liner. Top section.
Bottom section.
How long did all this take. My estimate is about 8 hours
total. Was it worth the effort. Oh yeah. I now have
the best armor protection in the market. The only real gotcha to
this entire process is knowing where to put the NP pocket in the
pants. It's recommended that you lightly sew the pocket in place,
put the armor in the pocket, put the pants on, and go sit on the bike
to make sure the armor is where it's suppose to be. If not,
readjust and then permanently sew the pocket into the pant liner.
It was all worth it for me. I now have a pair of Fieldsheer
Mercury pants that uses BMW NP armor. Now how cool is that?
Written on: December 19, 2008
Last modified: December 19, 2008