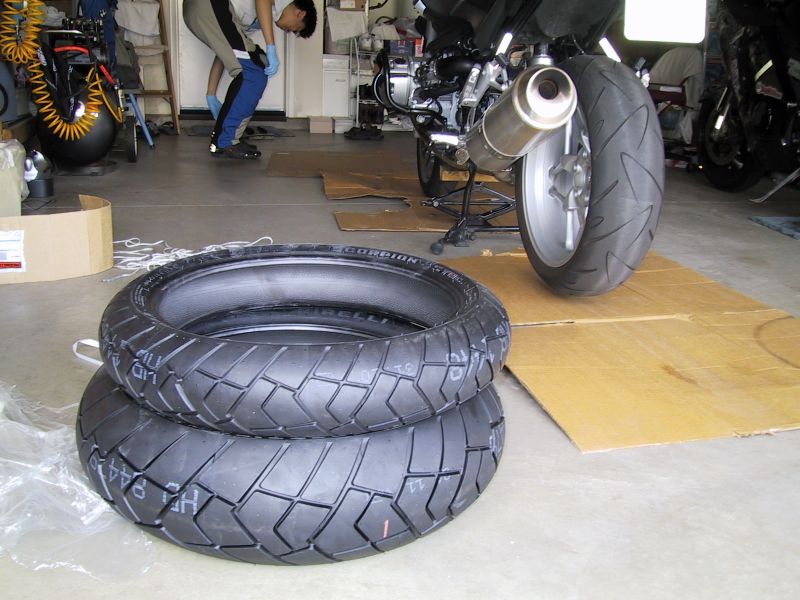
Because I received my new set of Pirelli Scorpion Sync last Monday,
because I've put on at least 8.5K on the current Conti Road Attacks
(It's awfully flat at the center from so many Fwy rides), and because
the Captain has received and setup a tire changer in his garage, it's
time to run over to his place and swap out tires. What can I say,
the universe is agreeing with me.
My buddy, the Captain, and I are tired of paying over priced non caring
people to slap rubber on our wheels and declaring it safely done.
The last time I took my bike to the dealer for a tire change, they told
me I had to pay an extra $30 fee for bringing in my own set of
rubber. WTF! The Captain would bring his wheels to a bike
shop to have tires changed out. When he gets the wheels back,
there are new dents and scrapes to ponder about. To make a long
story short, the Captain and I are tired of such unnecessary drama and
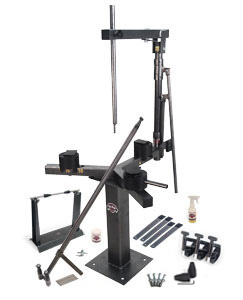
have decided to join funds to purchase a tire changer. We have
decided on the No-Mar
name because they've been known as a good brand for motorcycle tire
changers.
Surprise surprise, there are no instructions with the tire
changer. This is horrible? Did they forget to include a
manual? Hardly. Instead, you get on the Internet and go to
the No-Mar website (http://www.nomartirechanger.com/)
and watch the numerous videos they have on how to change a motorcycle
tire. They have video instructions for a generic tire change in
addition to specific motorcycle manufacturer's tire change. The
Captain and I watched and watched. We studied the video 4, 5, or
more times. We observe where to apply the spray on lubricant,
where to apply the tire grease, what pegs to use when breaking the
bead, etc. We studied the video so much that by the time we're
ready to change tires, we can recall the steps by memory instead of
having to look at the videos. This is good because the Captain's
garage doesn't have an internet connection. I'm sure he can set
it up if he wanted to, but there is no need for such luxuries.
I have never changed out tires for a motorcycle before. The
original thought of doing such a thing has me thinking, "Can I change
it myself? What happens if the wheels fall out in the middle of a
ride? I'm sure to at least do the superman if that's the
case." All these thoughts and fears are quickly quieted when I'm
finally pull the from wheel's axle after securing the two front break
calipers to the Telelever with two pieces of nylon twine, but I'm
getting ahead of myself here.
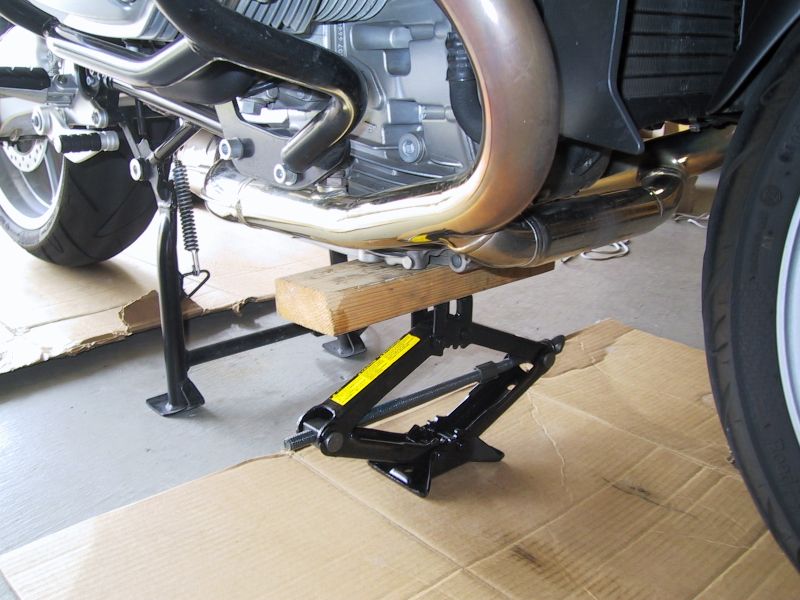
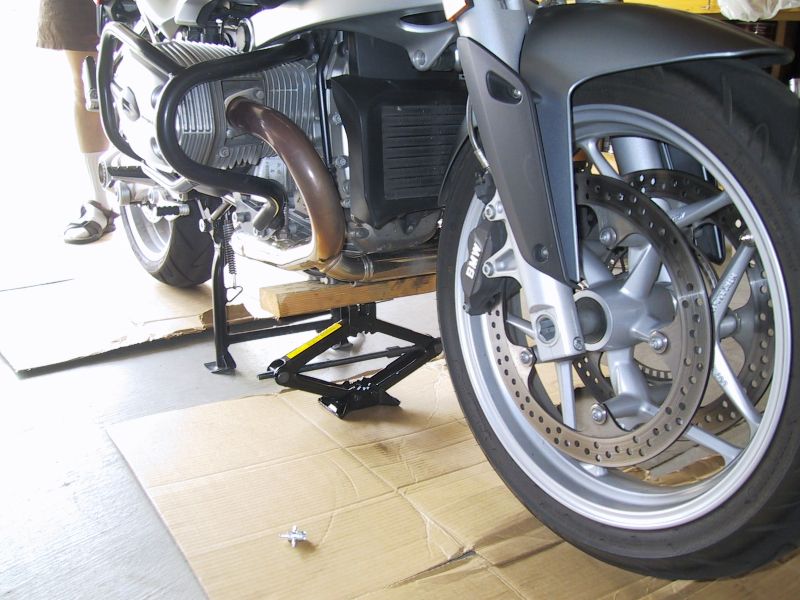
A jack and a block of wood is as good as any fancy front fork jack.
That little silver thing on the cardboard is the valve stem core
removing tool.
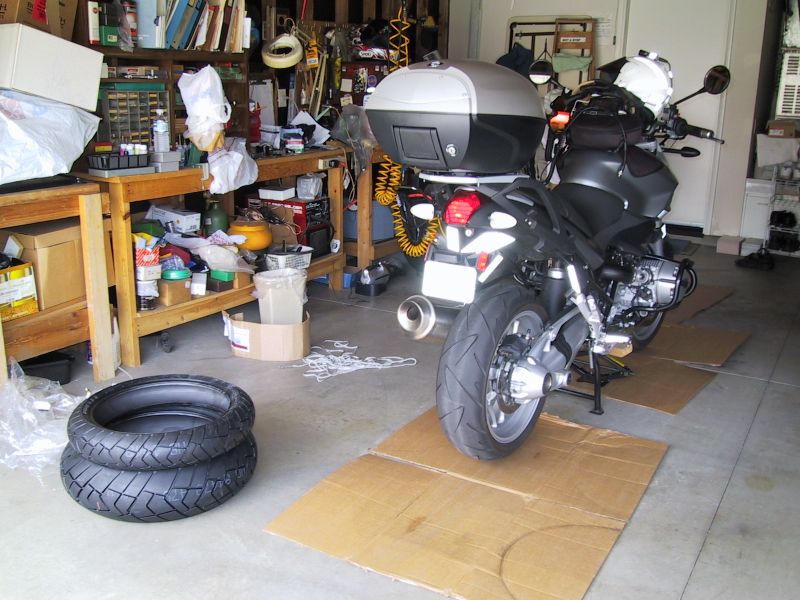
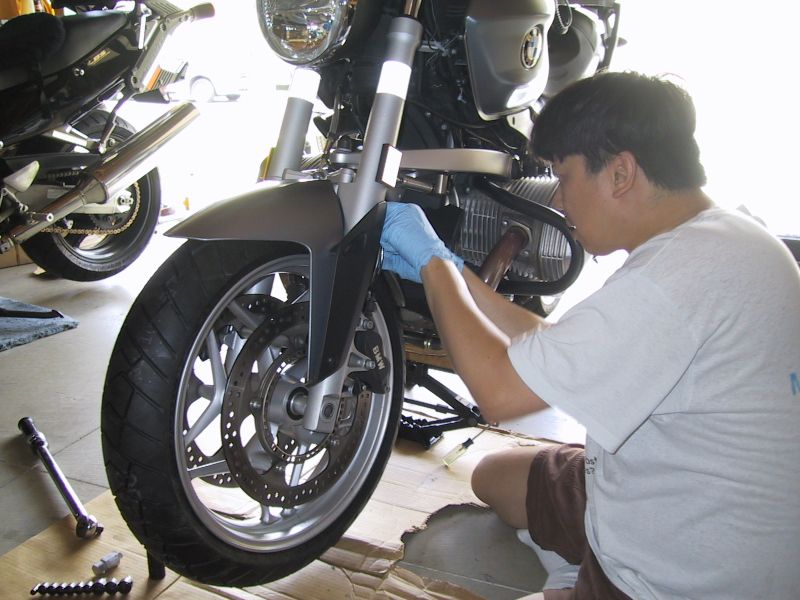
The first order of business is to put the bike on the center stand and
jack the bike up so that the front tire is off of the ground.
Next we remove the tire valve cores from the tire valve stems.
The front and rear tires both whistle in relief. Next we remove
the front left and right break calipers. Following the
instructions in the owner's manual, I rock the calipers ever so gently
to make enough clearance for the calipers to be pulled clear of the
rim. The calipers are then stress relieved by tying some nylon
twine to the Telelever and then to the break calipers. Yup, there
is no stress on the break line itself. We then remove the front
axle and out comes the front wheel. I don't' recall seeing
explicit instructions in the owner's manual of the '05 R12GS on how to
remove the wheels. However, the R12R's owner's manual does show
the procedure and even gives torque values. Very nice.
Thanks BMW. For once I'm not forced into purchasing the repair
manual just to learn how to take my wheels off.
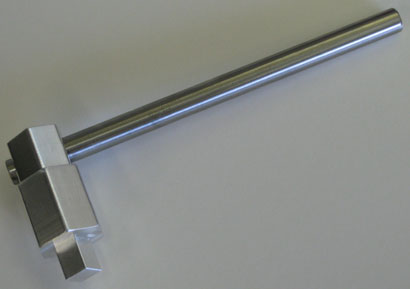
Special BMW front axle removal tool (22mm).
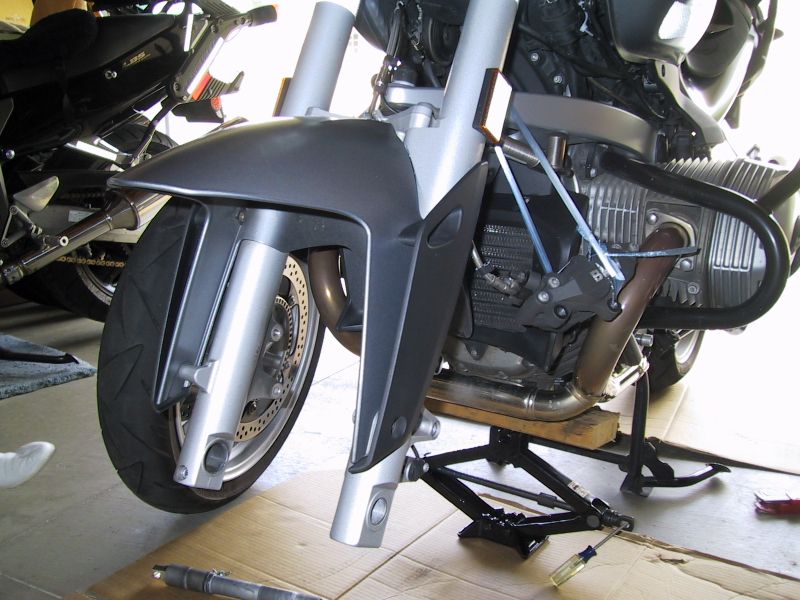
Check out the high tech break caliper stress relief mechanism.
I hear this from practically everybody I've talked to, they all say
it's near impossible to break the bead on a tubeless tire. I
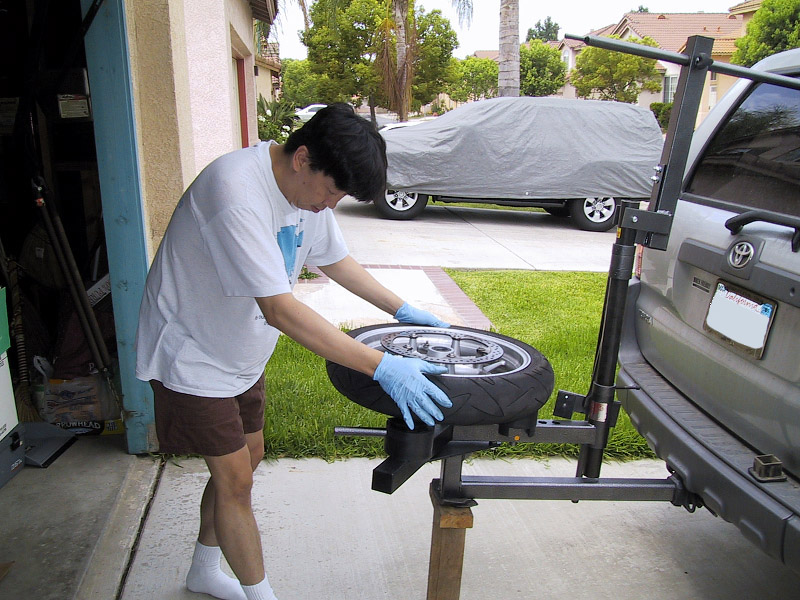
don't know, maybe it's this tool. When I put the front wheel on
the No-Mar tire changer
and use the bead breaking tool, the bead of the
tire pops off with relative ease. Interesting. I finish
breaking the bead on both sides of the tire. I then use three of
the plastic clamps to depress the tire and expose the rim for
clamping. I flip the wheel over and clamp the rim to the tire
changer. The three clamps are then removed in preparation for the
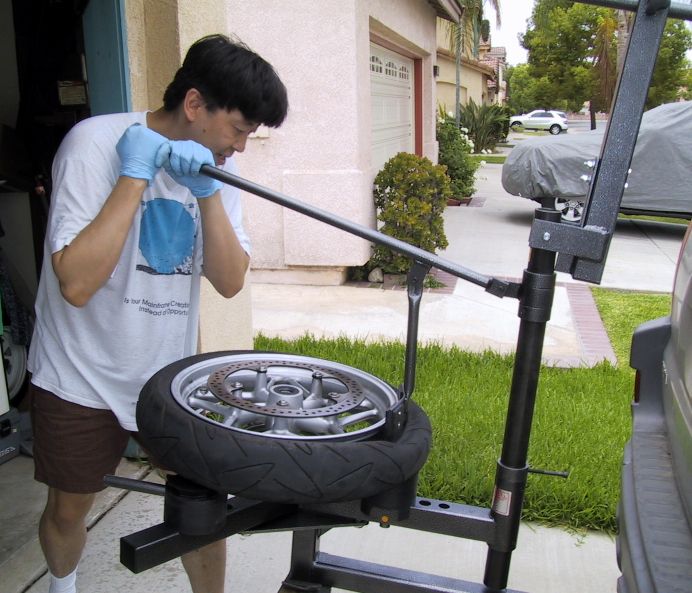
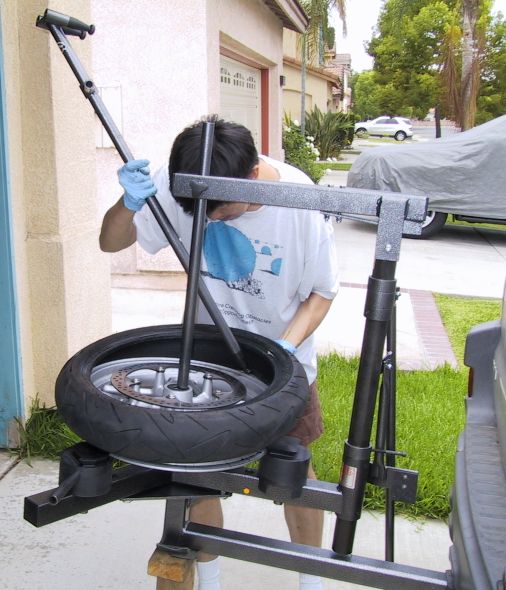
tire's removal. I spray some lubricant on the tire to allow the
tire removing rod to move without snag. The tire removing rod is
inserted at approximately 8 o'clock location of the tire. The
center rod (leverage rod) goes down. With a push of the rod
against the center rod, the top half of the tire pops right off.
Cool! I then pull the tire up and insert the rod once more at 8
o'clock. Again, a push of the tire removal rod against the center
rod and the entire tire pops off. That was remarkably easy.
It is just like how they described it in the video on the
website. No surprises here.
Breaking the bead. It's way easy.
One side is done. Now for the other side.
We then clean up the rim and remove all the existing weights.
Here's an additional step we do that doesn't appear in the video.
We go ahead and put the rim on the balancer. This tells us what
part of the rim is lightest and what part is the heaviest.
Because we know what part is the heaviest, we know to put the tire on
so that the lightest part of the tire matches up with the heaviest part
of the rim (e.g. the two red dots). We put a little sticker to
indicate where the heavy part resides. The rim goes back into the
tire changer. This time around we grease the inside of the rim,
the inside of the tire, and the outside of the rim from the 10-2
o'clock range. The first half of the tire slides right in with a
little coercion. Now we use the yellow bead holding clamp to
prevent the tire from slipping while still holding the tire down.
This time around we insert the tire mounting tool onto the tire.
It goes OK but we ended up hitting a snag. We didn't put down
enough grease. The Captain adds a little more grease to the
inside of the tire from the 10-2 o'clock position and we continue the
installation. Sure enough, the tire goes right on in. The
final inspection shows that we have the tire mounted in the correct
direction of travel. We take the tire off and inflate the tire
until the beads are set. "Pop! Pop!" That's both sides of
the front. We've set the bead. Wow! That's no too bad
at all. I'm getting to like this tire installation process.
Next we put the tire back on the balancer and finish off the balancing
process. 4 1/2 7 gram weights later, we're completely
balanced. Now we put the valve stem core back in and inflate the
front tire to 35 PSI. That wasn't hard nor bad at all. Of
course we reverse the procedure for taking the front wheel off, but we
made sure to grease the axle before installing it. The last thing
to do here is to give the break a couple of pumps to reset the break
pads and make sure the breaks work. Again, having the torque
specs in the owner's manual helps tremendously.
Everything is back on. Now if I can just put the ABS wire back in
without damaging it ...
The rear wheel is not all that different from the front. Aside
from the need to swivel the muffler to one side, the rear wheel is much
easier. This is because the wheel mounts to a hub on the
Paralever. There are no considerations for break calipers, etc.
because all that stuff is on the other side of the hub. I only
have to worry about removing the wheel from the hub. We did
pretty much the same step as above to unmount, installed new valve
stem, balance, mount, set the bead, and final balance of the
wheel. It's all good. I did put an ever so little and very
minor scuff mark on the rim when we tried to unmount the second half of
the tire. We're learning so it's OK. We torqued everything
back in at the specs given in the owner's manual. We inserted the
valve stem core back in and inflated the tire to 40 PSI. We
reseated the muffler and tighten down the clamp where the muffler slips
on. All done. That wasn't half bad. No we spend time
cleaning up the Captain's garage before setting off for lunch.
From today's exploits, I'm happy to report that the No-MarClassic Tire
Changer works as advertised. We were able to do all this by
studying their tire changing videos. Additionally, the No-Marstatic balancer
also works as advertised. Both of these tools
make a complete set and allows any Joe, like me, to change out tires
without perturbation. From a scale of 1-5, I rate the Classic a
5+. The Captain and I are super happy to own this
wonderful piece of equipment. I'm simply delighted to know that I
can change treads at any time I desire.
[ Monday - July 21,
2008 ] - Update!
It's been a little more than a week on the new set of rubbers.
Can I tell the difference between the semi-aggressive tread pattern of
the Pirelli Scorpion Sync as opposed to the more slick like Conti Road
Attack? Nope. All I can tell is, these tires are as smooth
as silk and they stick like fly paper. I think I get a little
more vibration, but it's all in my head. After approxiamtely 60
miles worth of break in, I'm cranking the bike over to feel that sweet
lean angle. You got it folks, I'm working that chicken strip to
the bone.
As for the fact these tires have been installed using the No-Mar tire
changer, it's still a sweet deal! The ease at which I can install
my own tires gives me a major mechanical skills boost in
confidence. No ego mind you, just a boost in confidence.
Written on: July 13, 2008
Last modified: July 21, 2008