You only need a new
left shoe?
NOTE: If
you use my procedure for changing tires, you're doing so of your own
free will and I'm not responsible for your well being. This
information is just that... information.
[ Saturday -
September 11,
2010 ]
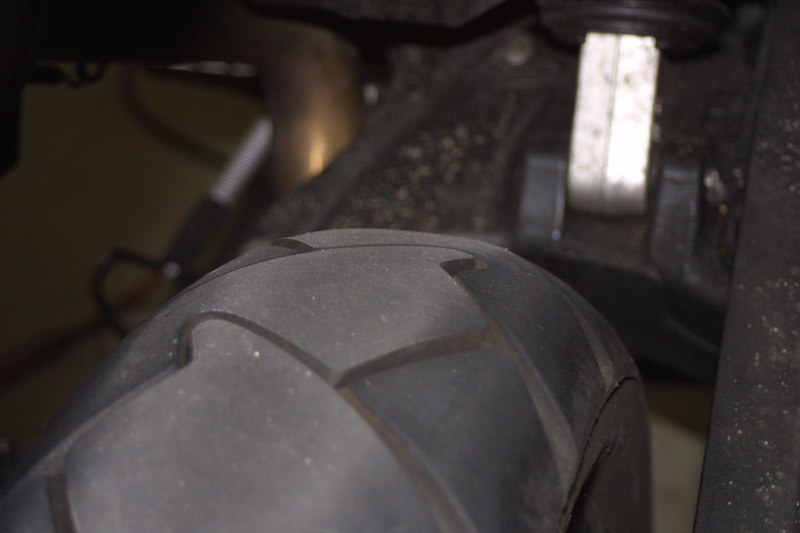
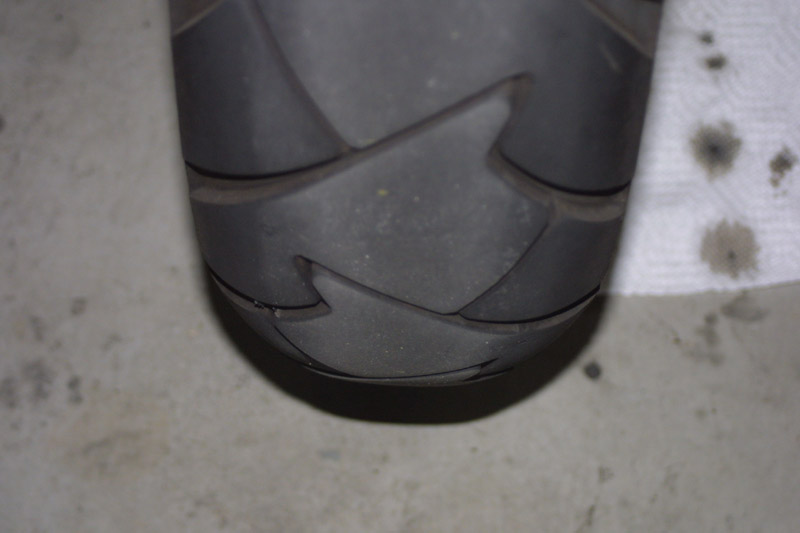
Not bad at all. At 8K miles, the 90/90 21 front tire is due for a
swap out. The tire can probably last another 1-2K miles, but
cracks are forming everywhere within the treads.
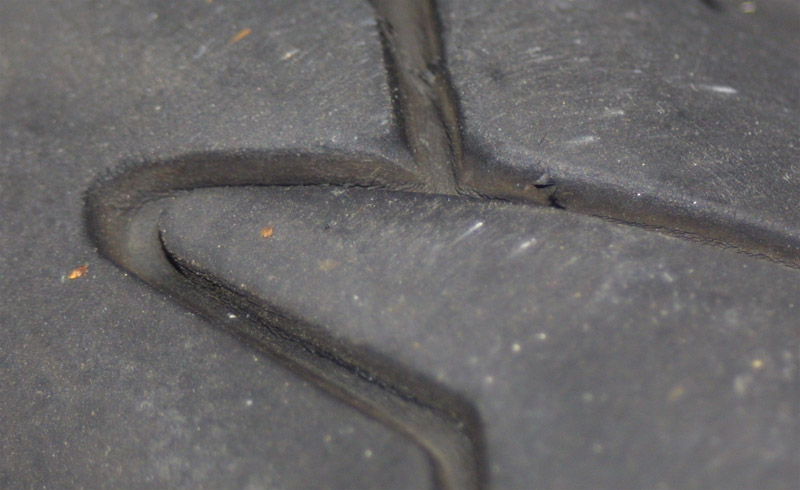
Hairline cracks.
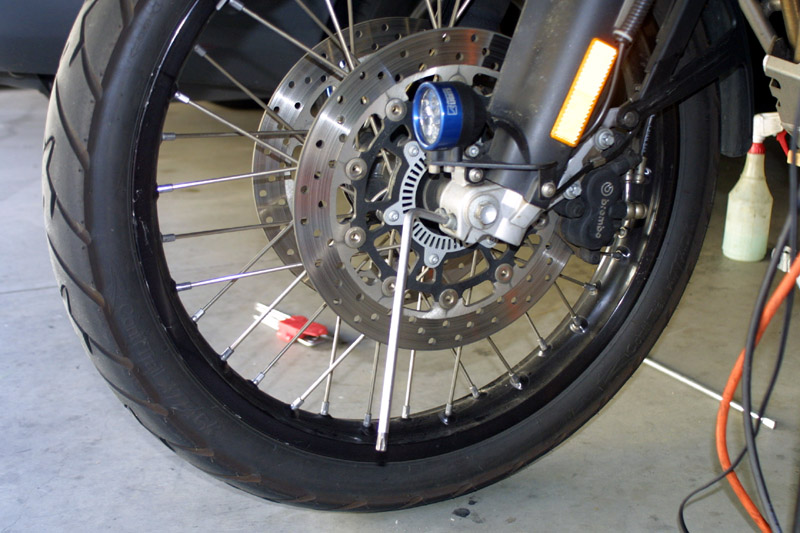
The interesting thing is, the 150/70 17 rear is showing extreme
resiliency to wear. At 8K miles, there is a little wear in the
center, but the rest of the tire is still in good condition. As a
result, I'm leaving the rear alone and swapping out the front only.
Ignore the shadow and you'll see the shape.
I went ahead and bought another set of the Continental Trail Attack,
but now I get to stow the rear away until the rear is ripe for the
picking. This looks to be a two front to one rear type of
situation. True to the Brown Motor Works service manager's
comments, it does look like the 8GS is cheaper to
maintain. At $80 for the front tire, good for 8K miles, it's
definitely more economical.
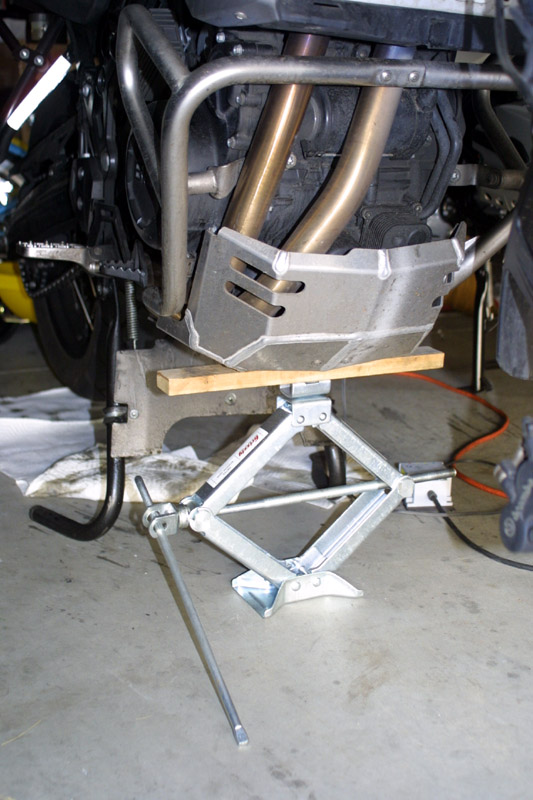
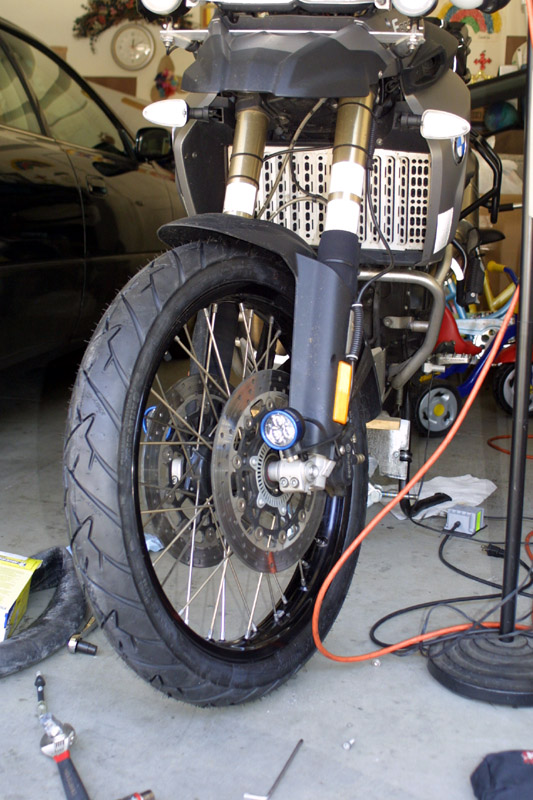
To start it all off, I put the scissor jack under the bash plate and
jack up the bike just a little bit. The front is still well
planted on the floor to allow for easy undoing of the bolts.

Probably could have done it without the wood, but what the heck.
Now it's time to undo the fork axle lock nuts and axle bolt.
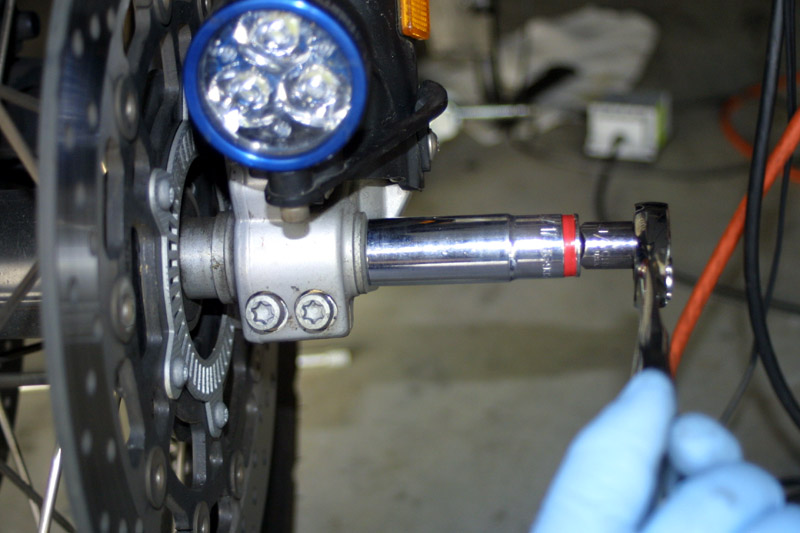
Right side...
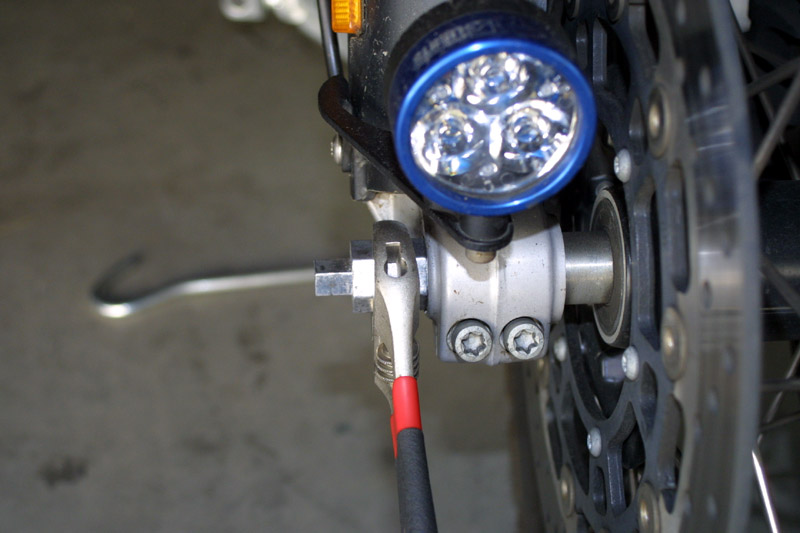
... Left side.
Quick release bolt undone.
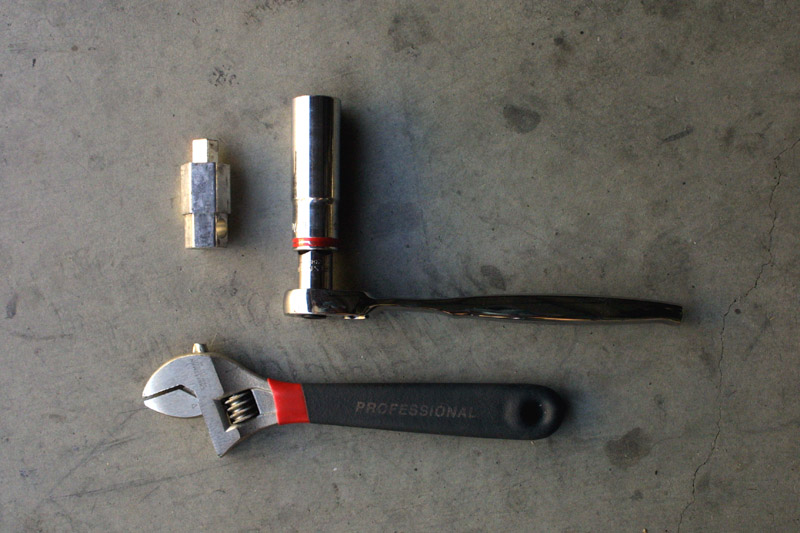
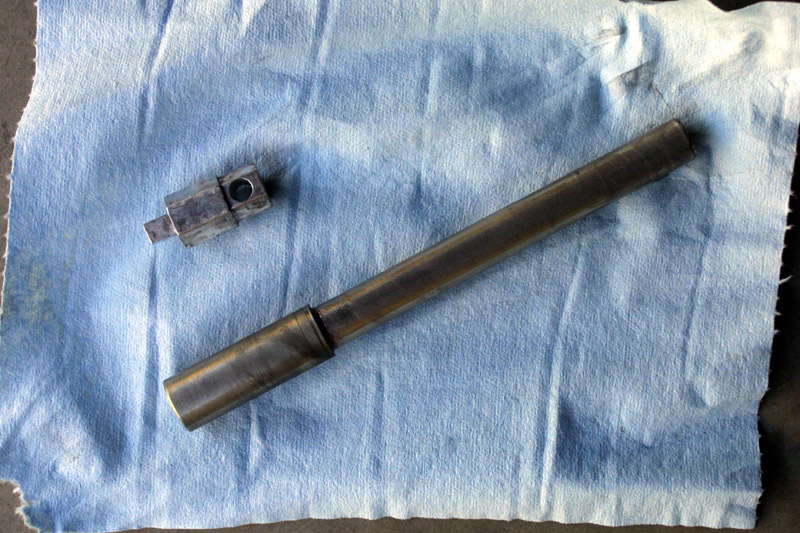
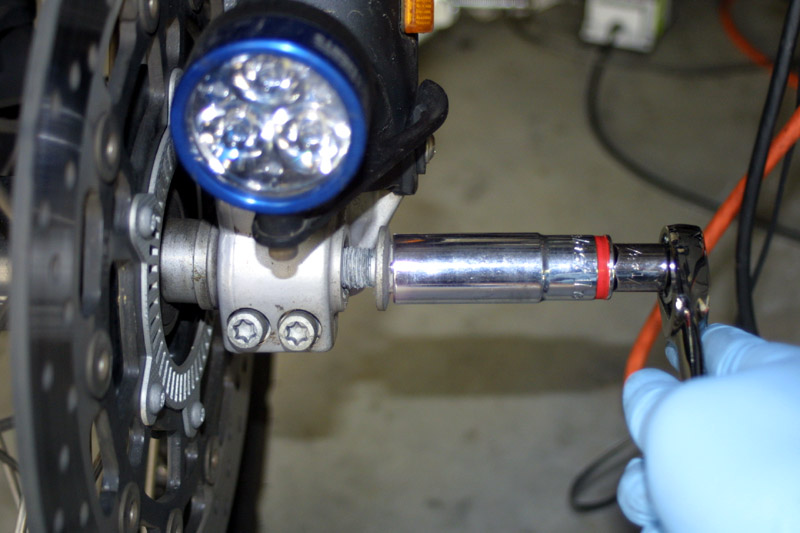
Now there is an alternate way of doing this if you don't have the Marc Parnes BMW
front axle removal tool. That method is to simply leave the
lock bolts in place and undo the 17mm axle bolt. Once the bolt is
unscrewed, you then release the lock bolts and the entire thing comes
out. There is nothing wrong with using this alternate method
other than you have to finagle the tightening of the axle later.
In my case I already have the front axle removal tool so it was easier
just to do this. In fact, with the first tire change out, I
didn't use the front axle removal tool. I used the alternate
method and never experienced any problems with the front wheel.
Before removing the wheel, don't forget to take the ABS sensor out and
remove one of the two brake calipers. I prefer to remove the
brake caliper that doesn't have the ABS sensor wire snaking around the
fork. Removing just one caliper is sufficient to easily extract
the wheel.
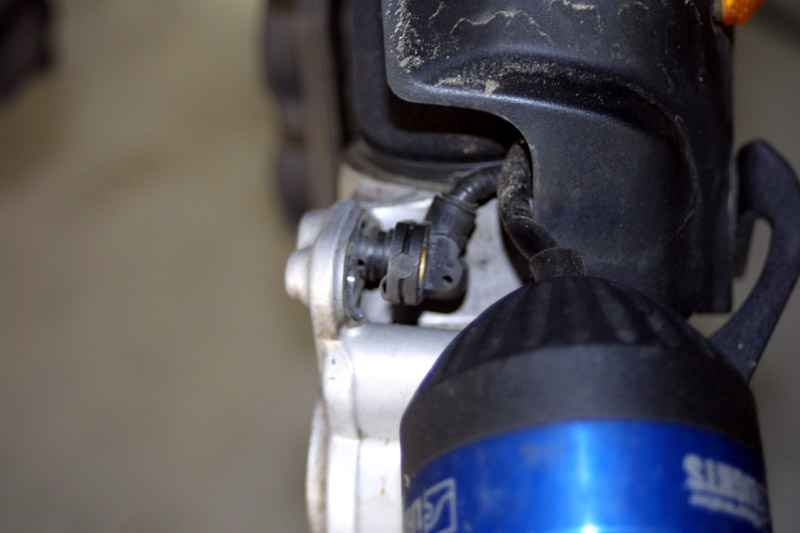
Just slide it out a bit.
(I forgot to take these pictures prior to removing the front
wheel so the wheel is already gone.)
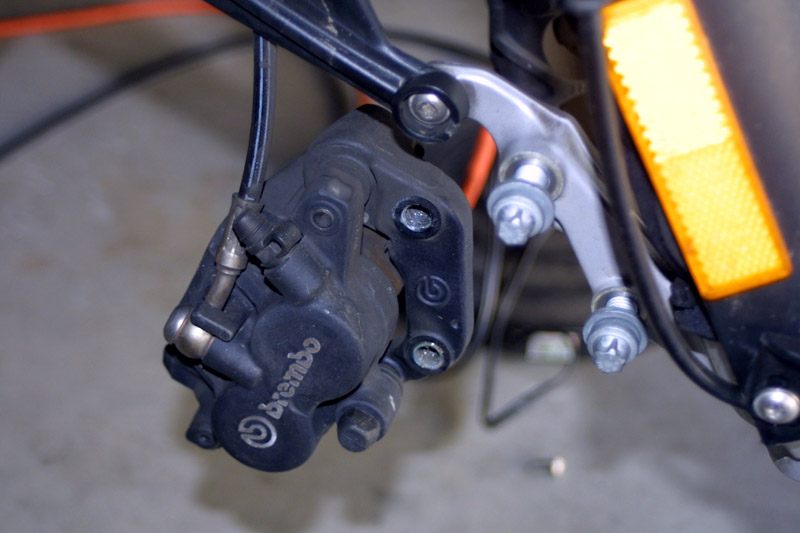
The non-ABS brake caliper.
Now jack up the bike a little more so that the front wheel is a bit off
of the ground. This will give the wheel just enough clearance to
drop down a tad and roll out.
Jacked up just a little more.

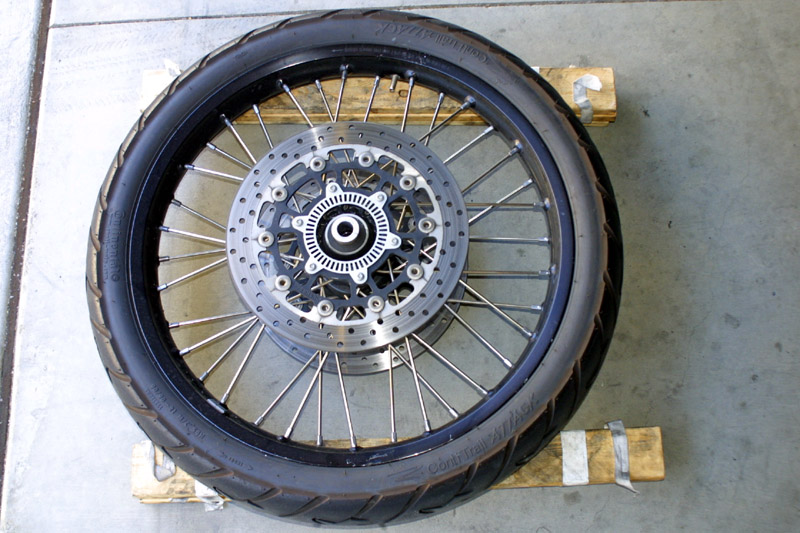
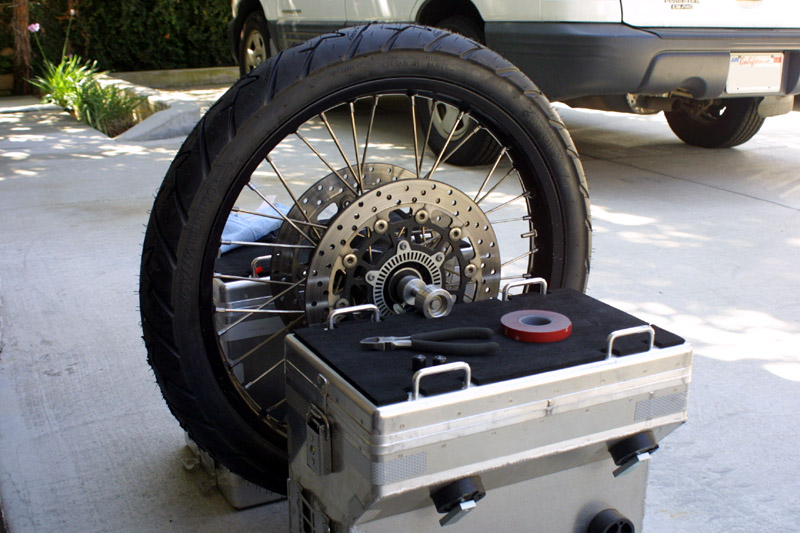
Front wheel off and ready for some new treads.
The best way to prep for the tire removal is to simply take a valve
stem removal tool and remove the valve stem to let all of the air
out. I remove the valve stem while being wary of the valve stem
wanting to shoot out like a rocket. I probably shouldn't have
cared as I'm planning on changing the tube anyway. I'm using a
new Micheline butyl tube as I'm not happy with the Metzler natural
rubber tube. Why? The Metzler tube loses pressure too
quickly. If the existing tube is a good one, I would have kept
the tube.
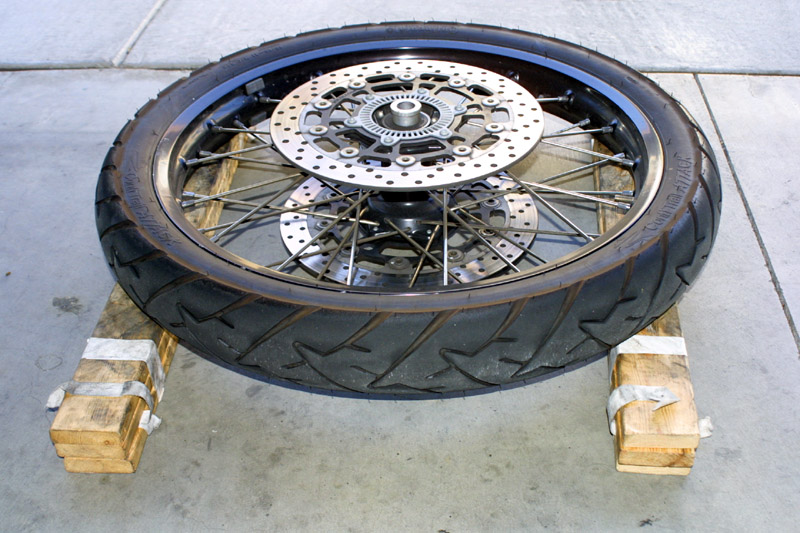
I don't know what other folks out there use to lay their 21" wheel on
the ground, but for me it's two planks of wood (per say). This
elevates the brake rotors and prevent them from being damaged. I
guess the alternate method is to remove the brake rotors. Too
much work if you ask me.
Now comes the bead breaking part. This is where I love working on
the 90/90 21 tire. Bead breaking? What's that? How
about I just heal the tire instead. Yes, you got it folks, it's
easier to break the bead on the 90/90 by simply jumping on the
tire. In this case, I'm the monkey that's bouncing on the
rubber. I break the bead on both sides. I don't have any
images of this because the monkey can't take pictures and jumping up
and down at the same time.
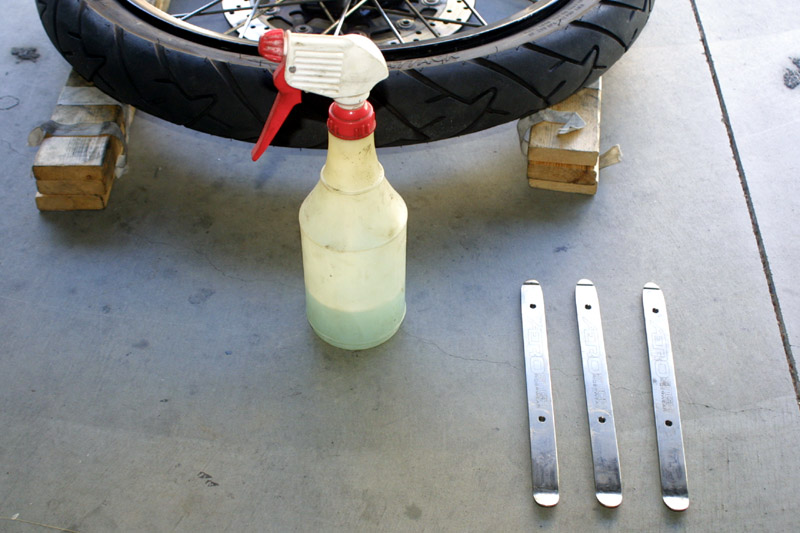
Now I take the BeadBrakR kit and drag the tire levers (irons)
out. This is all I need from the kit this time around. The
90/90 doesn't need the heavy duty bead breaker like the 150/70 rear.
BTW, if anybody tells you that soapy water is not the proper assist in
removing the tire, I tell you they're just trying to take your
money. As for me, a spray bottle with soapy water does just
fine. Hey! It's like high-tech man!
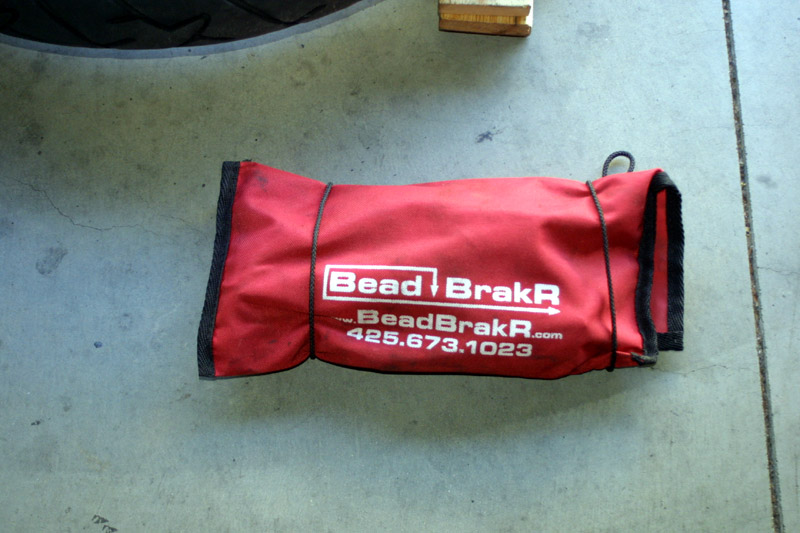
I promise to show the BeadBrakR at work when the 8GS encounters a rear
tire change event.
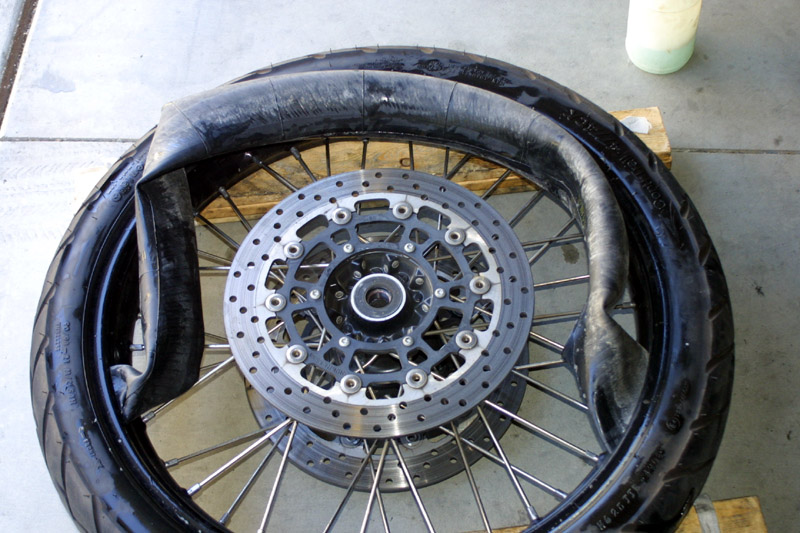
Note that the bead is already broken in the image above. That was
some awesome monkeying work.
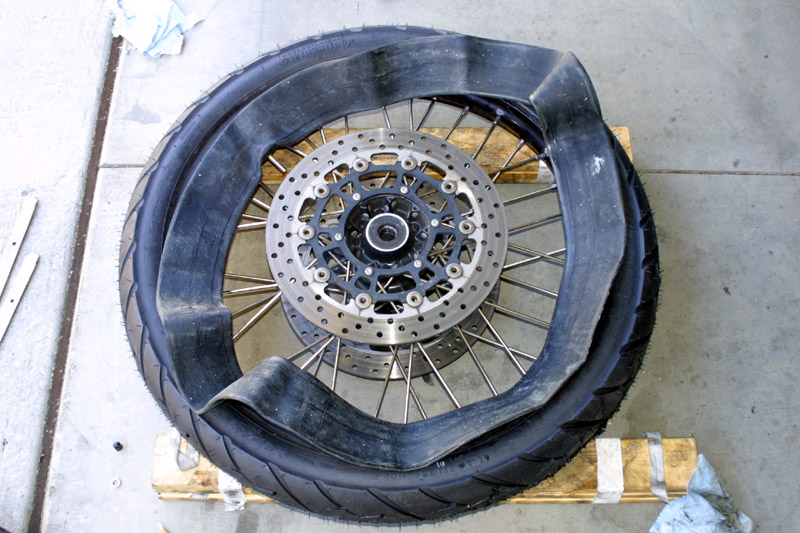
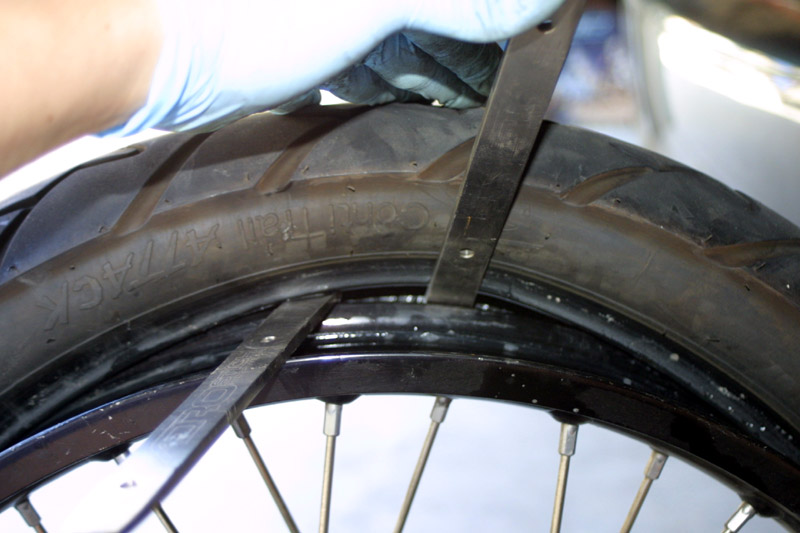
Now it's time to pry the old shoe off. Referring to the image
below... I start the work at approximately 90 degrees to the valve
stem. Why? Because it's easier to pry away from the valve
stem as oppose to at the valve stem. You know... something in
relation with, "More wiggle room". If you haven't noticed, I
don't care much about scratching my rim.
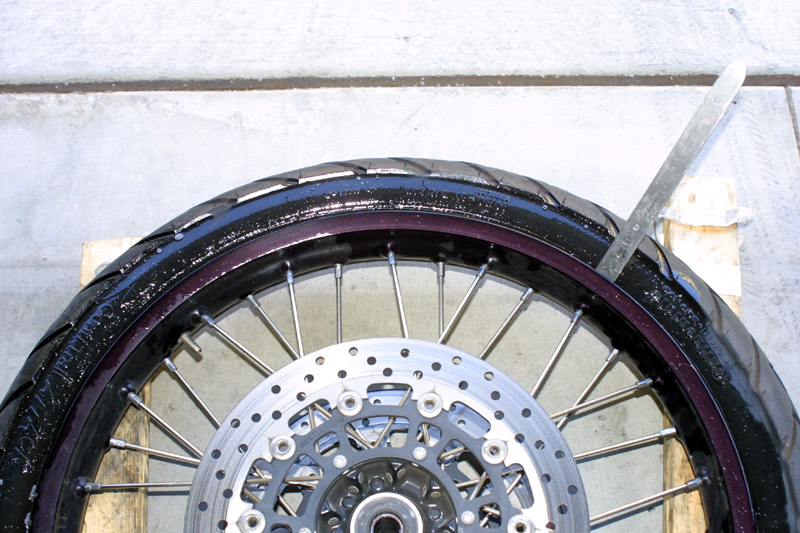
Notice the generous application of high-tech soapy water on the tire.
It's a simple matter of slowly prying the tire off of the rim
centimeter by centimeter.
Next thing you know, the tire is off on one side and I'm pulling the
guts out.
Now it's time to take the other side of the tire and push it off of the
rim. There is a trick to this. Of course this will vary on
the type tire and tire manufacturer. Some tires are tougher than
others. I like Continental tires because they have always been
pleasant to work with. Metzlers on the hand, have given me hell
in the past. This is mostly due to the compound being so
sticky. It's not necessarily a bad thing, just a pain when it
comes to removing the tire.
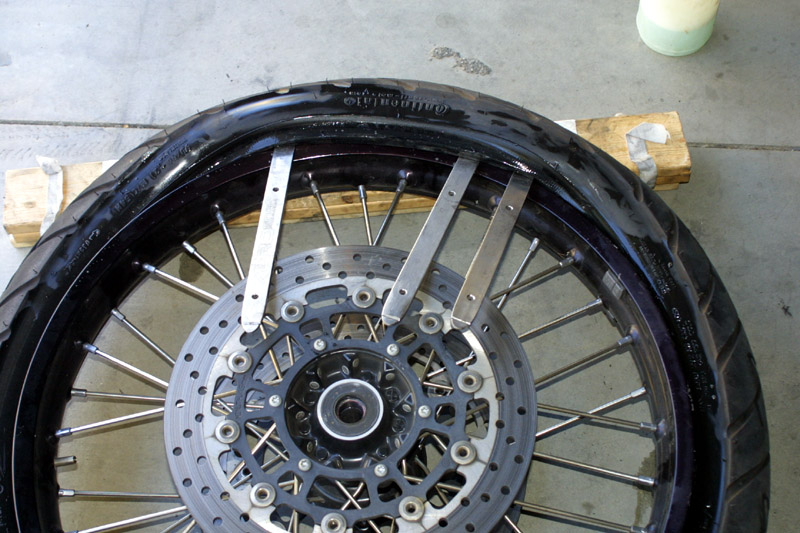
Now I take two tire levers. One is used to lift the tire up while
the other is used to begin forcing the tire off of the rim.
Lifting the tire up to allows for easy insertion of the second tire
lever.
The first tire lever stays where it is. The second and third tire
lever is used to push the tire off of the rim.
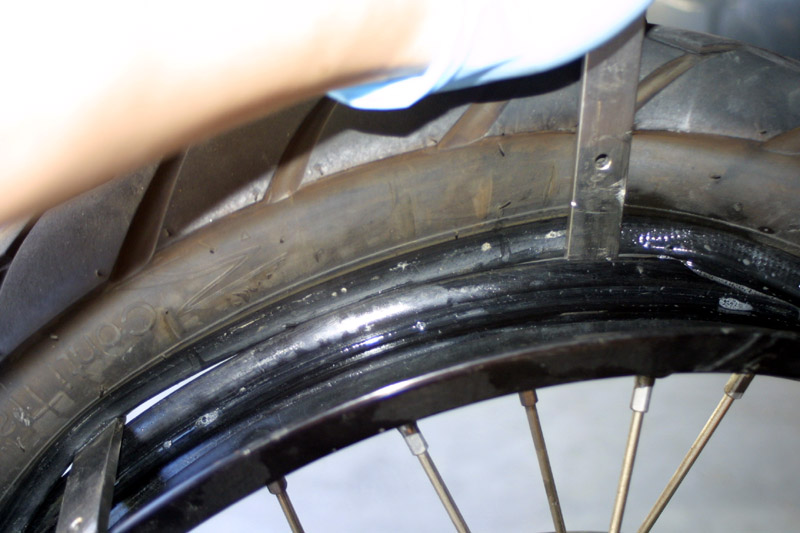
Inch by inch... centimeter by centimeter...
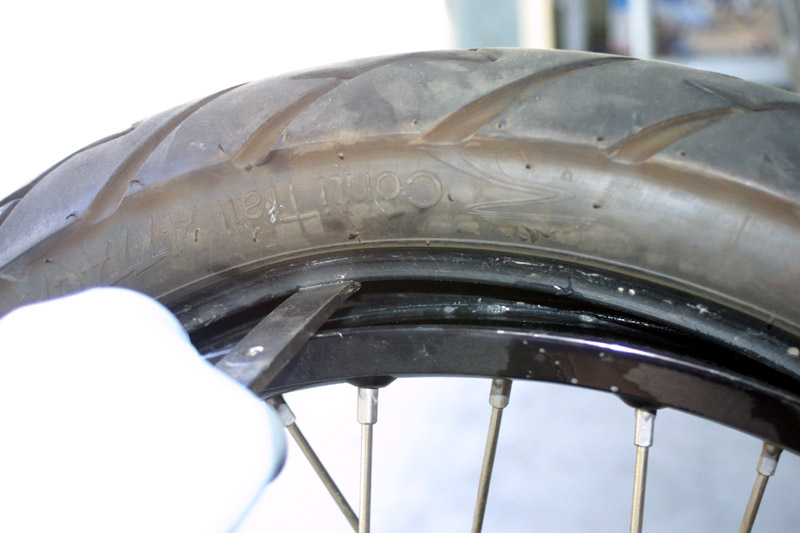
Note the far right side of the image above. There is a massive
wet spot on the bead of the tire and the rim. I periodically
spray the high-tech soapy water on the rim to allow ease of tire
removal from the rim. In fact, this is where I had problems with
the Metzler Tourance. The tire refused to come over the
rim. The Contis are a no fuss.
Next thing I know, the tire is off and I'm wiping the high-tech soapy
water from the rim.
I'm trying something new this time around. I see the OEM rubber
spoke nipple cover (e.g. rubber strip) isn't quite cutting it.
The cover comes off of the nipples exposing the nipple to direct tube
contact. Being a mountain biker, I figured I'd give bicycle rim
tape a try. I don't know what the long term effects will be as
motorcycle tires heat up much more than a bicycle tire. My guess
is the adhesives will dry out and possibly stick to the rim a little
better, or just flake off. I guess I'll know with the next front
tire change. I can't imagine it hurting the rim and/or the tube
as it's pretty thick cloth. We'll just have to wait and see how
this hair brain idea turns out in a future tire change. I'll find
out next year some time.
Now here is another trick to reducing the amount of weight(s) used to
balance the wheel. Before I do anything with the wheel, I take
the rim and put it on the static balancer. Of course I remove all
existing weights currently on the rim.
Get rid of that weight. It will interfere with identifying the
heavy/light spot for the rim.
The balancer shows me the light and heavy location on the rim.
Light end on top. Heavy end on the bottom. I mark the light
location with a Prismacolor white color pencil.
Now I search the tire for a marking. Some tires have a red
spot. Some have a bit of colored text. Some don't have
anything at all. In this case, the Conti Trail Attack has a white
B1 on the tire. How do I know this is the heavy spot on the
tire? I don't, but most manufacturers will place a mark where
they know the heavy spot is. I've also notice road tires will
have markings to indicate weight while off road tires are devoid of any
markings. Perhaps the manufacturers don't put a mark on the off
road tires because they don't anticipate very high speeds, or it just
plane doesn't matter when you're out there plowing around like a
tractor. Who knows!
Now I match up the marking on the tire to the marking on the rim.
Remember, the marking on the rim is for the light side. The
marking on the tire is for the heavy side. Matching these two up
could result in a balanced wheel with fewer weights needed for the
balancing process. No guarantees here folks! Oh! I'm
also careful to check for rotation direction relative to the rim.
I've made this mistake before and had to pull a new tire just to flip
the tire and mount it again. Ouch!
Stupid me, I put the tire on without taking some photos.
Basically, it involves applying high-tech soapy water to the outside of
the tire, with rotational direction in mind, and pushing the tire onto
the rim. I end up using the tire levers to help put the one side
on the rim.
Now the new butyl tube goes in. I don't have a specific trick for
putting the valve stem into the valve stem hole on the rim. I end
up cursing a bit and then manage to get the valve stem in. I Put
the valve stem nut on to prevent the valve stem from sliding back into
the rim. Slippage of the valve stem back into the rim is just
more cause for cursing.
Before going any further with installing the tire, I inflate the tube a
bit. If i don't inflate the tube before closing the tire off, I'm
more than guarantee to pinch the tube. That's just not
nice. I inflate the tube just enough so that it will consume the
tire cavity, but not enough that it will put pressure on the tire and
rim. Having too much pressure will prevent me from installing the
rest of the tire. I let out as much air as necessary.
Now I close the system. Tire levers and high-tech soapy
water. I spray the soapy water on my hand and run it on the
inside of the tire to allow the tire to easily slip over the rim
wall. The alternate way to do this is to soap water the
rim. Now it's just a matter of carefully coercing the tire into
place. Ever slowly and carefully while trying not to
damage the tube.
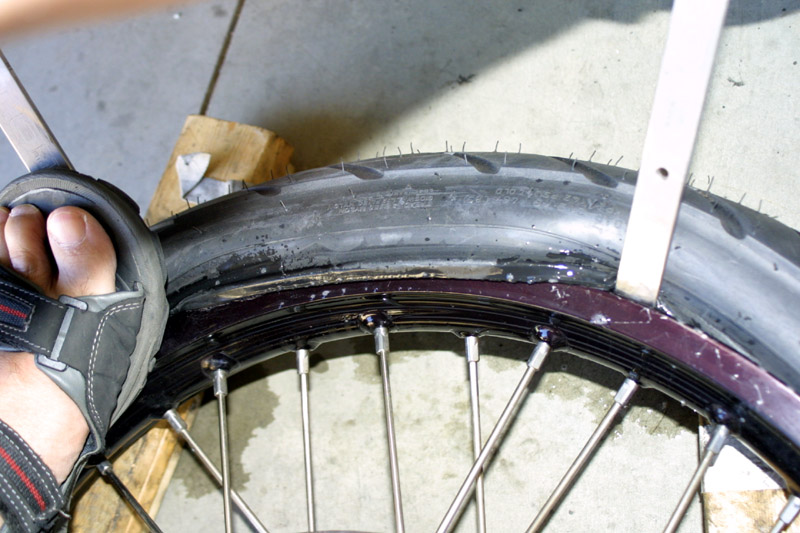
Almost there. Just a little more. Notice the soapy wet
spots.
At long last, it's all on. I inflate the tire to 35 PSI, tighten
the valve stem nut, and put the wheel on the balancer. Now it's a
matter of the final balance before the wheel goes back on the bike.
Without any weights on the wheel, the wheel should rotate so that the
heaviest part is at the bottom and the lightest part is at the
top. It sometime take the balancer a while to settle out the
heavy part. After that, it's just a matter of putting the right
amount of weights at the light end to balance the wheel.
Do you remember all the bla bla bla above about the text on the tire
and the light end of the rim? Well, as it turns out, when I put
the final package on the Marc
Parnes
portable
wheel
balancer, the wheel was nearly
balanced. Performing rotate and release at numerous angles shows
me that the wheel is ever so slightly out of balance. Putting an
approximately 5.25 ounce weight seems to have calmed the already
purring beast. The wheel is balanced! Wow! 3/4 of a
weight cube. I've never had to use so little weight before.
This is way cool.
By the way, I don't throw away the old weights. I keep them,
clean them, and reuse them. I use the 3M indoor/outdoor double
sided tape because it's handles water perfectly fine and can be removed
from the rim without assistance from Goo Gone.
Now the wheel goes off of the balancer and back onto the bike. I
wiped the axle clean and re-greased it. I then reversed
everything I did to take the wheel off. I put things back in
accordance with the torque values defined in the owner's manual.
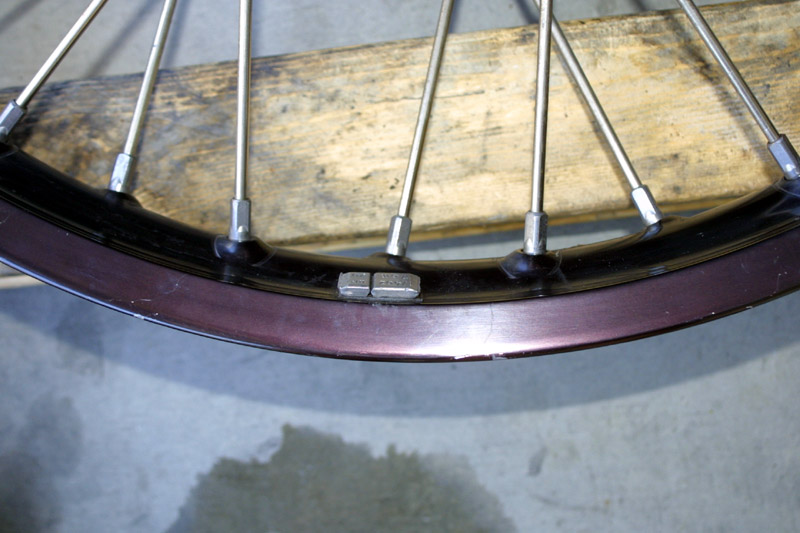
Look at the one little weight cube at the center of the rim towards the
bottom.
Before I start the cleanup of the garage, I alcohol wiped the brake
rotors to get rid of any potential soapy water residue.
Every tire manufacturer uses a silicone spray on their tire mold before
they bake the rubber. This silicone spray allows for ease of tire
extraction. That's all good for the tire
manufacturer, but it's no good for us customers. If you've ever
wondered why motorcycle shops tell you to take it easy for the first 50
miles on a new set of tires, it's because they're telling you to
carefully get rid of the silicone lubricate before committing to that
knee drag on the canyon roads. Some folks just take it easy on
the streets and the silicone
comes off over time. Others go into a parking lot and start doing
figure
eights. Some use sandpaper to sand it off. For me, I give
the new tire (especially the front) an alcohol bath (e.g. wipe down) to
get rid of the silicone lubricant. The ending result is a shinny
but ultra sticky tire.
At this point it's a matter of putting everything away and be content
with the work that I have done. All this took about 2 hours with
photography in between. My guess is, I can probably change out
the tire in an hour.
I will check the tire the following morning to ensure there is no
damage to the tube during installation. A quick tire pressure
check will reveal everything.
[ Sunday -
September 12, 2010 ]
The pressure held over night. I'm good to go.
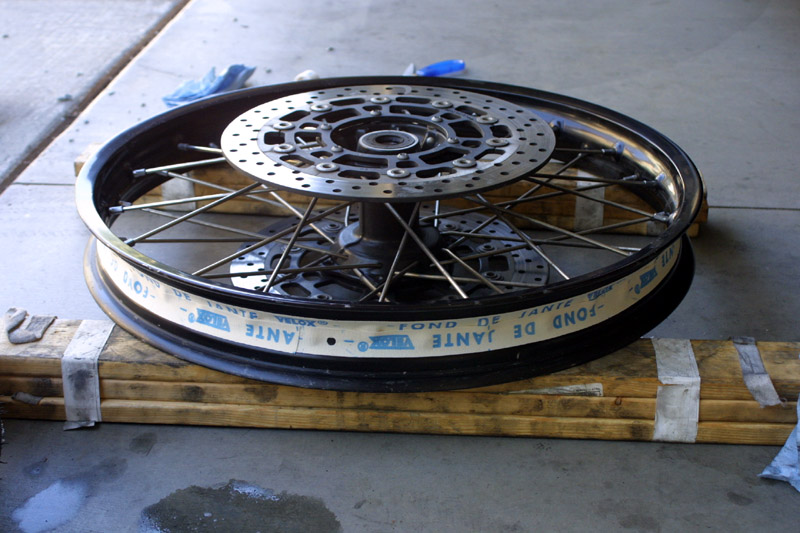
[ May 30, 2011 ] - Update
I've taken the front tire off and the Fond De Jante - Velox rim tape
has been doing fine. The tube does push the take around a bit
during the mounting process, but it's nowhere close to the rubber
strip. None of the spoke nipples are exposed to the tube and the
tape has held very well relative to the tire heat. The wheel is a
little lighter than with the rubber strip, and multiple instances of
mounting and unmounting the tire/tube doesn't seem to effect the rim
tape much. I've also went ahead and use the rim tape for the rear
wheel also. The use of soapy water doesn't seem to effect the
tape much. I'm sticking to this concept for future 8GS tire use.
Written on: September 11, 2010
Last modified: May 30, 2011