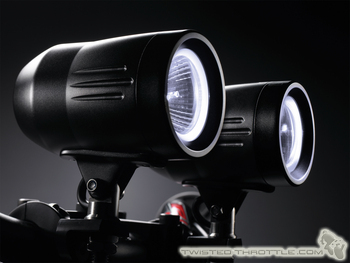
 PIAA Cross Country HID / Trail Tech SCMR 16 HID
Got HID?
PIAA Cross Country HID / Trail Tech SCMR 16 HID
Got HID?
[ Friday -
January 16, 2009 ]
It's been a good week since I've installed auxiliary lights on the
12R. Here I thought the stock headlight is plenty good. It
was all fine until
my buddy the Captain who showed me his HID conversion , on his '97
Blackbird, and the error of my ways . To rub salt on the wound,
he even mentioned how much safer he
felt being able to see at night. That's it! I
had to follow his example.
The Captain's Blackbird with his low beam converted to HID.
I didn't want to convert my existing lights to HID because of concerns
for the light when I do stupid things like ... stall the bike.
HID light don't like to be flickered on and off. It's either on
or off. Nothing in between. So I elected to mount external
lights.
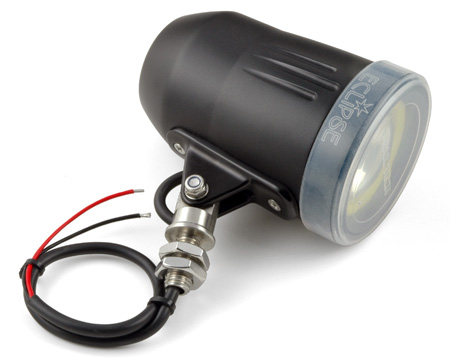
As for the hardware, I was too naive to know any better. I
purchased the PIAA
Cross Country HID from twistedthrottle.com
when I should have purchase the Trail
Tech lights instead. In fact, PIAA repackaged the Trail Tech's light and
marked up the price by at least 75%. It goes to show ignorance is
not bliss. Oh well, I already paid for the lights so I might as
well put them to good use.
Can you see the difference between the two units above? I
definitely can't. Actually there is one difference. The
label. Other than that, the units are identical. If you
decide to purchase these lights, get the Trail Tech version. It's the
same and it cost less.
What's the big deal with this unit as oppose to going with a different
HID kit? Easy. The answer has to do with available space
for a ballast. Yes, there is plenty of room under the seat to
mount a ballast, but I don't want to run electrical wires all over the
freakin' place and back. Each of these lights have a built in
ballast so all that is needed is to mount the light and wire them
up. No need to find that double sided mounting tape and a
location to stuff the ballast.
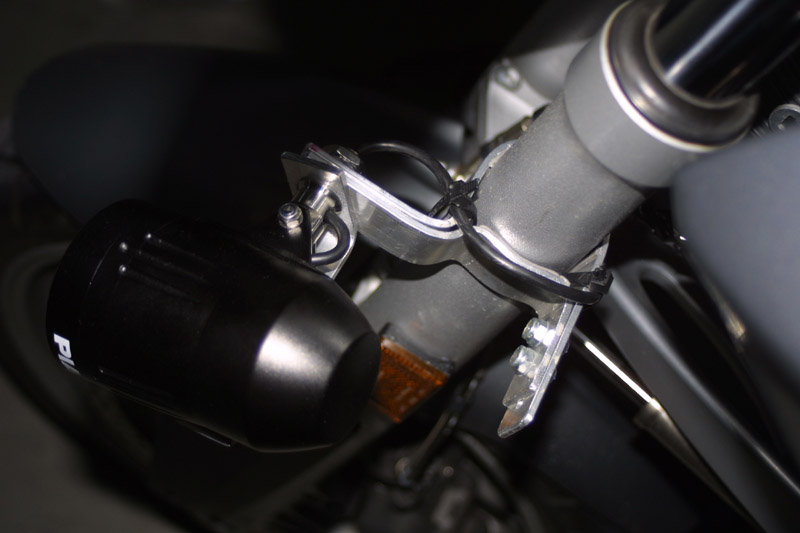
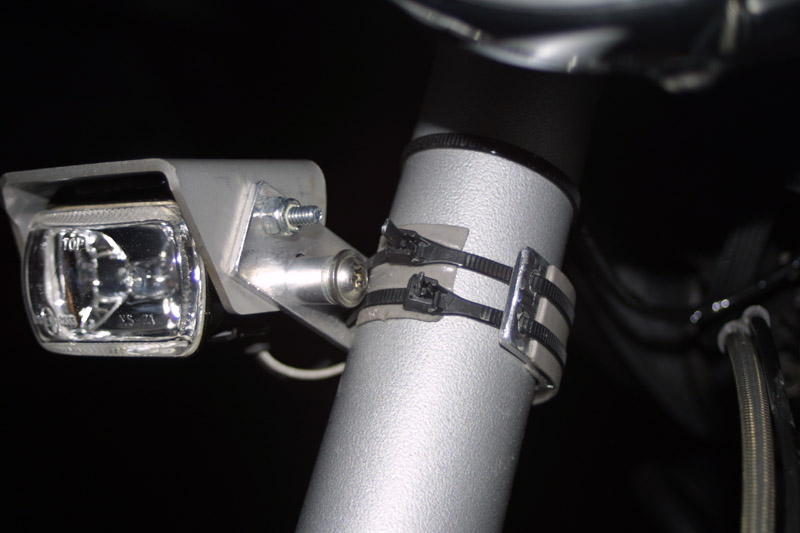
As for where to put lights on the R12R, I ended up mounting the lights
on the forks. There really aren't that many places you can mount
lights on the 12R. It's so bare bone that it's hard to mount the
light at a location where it doesn't get in the way. I researched
on the Internet and found out a couple of places that make light
bracket mounts. At $150 for a set of CNC aluminum mounts, I said,
"Forget it
buddy." Instead I created my own light brackets using some stock
aluminum strips from OSH. $7 and some quality time with the
machine. Now that's what I call putting your time and money to
good use. Actually, I ended up scrapping a couple of trips of
aluminum because I don't have a machine shop and wrecked a couple of
mounts. I started over several times but in the end found what I
was looking for. Still, $21 worth of
aluminum is nothing compared to $150.
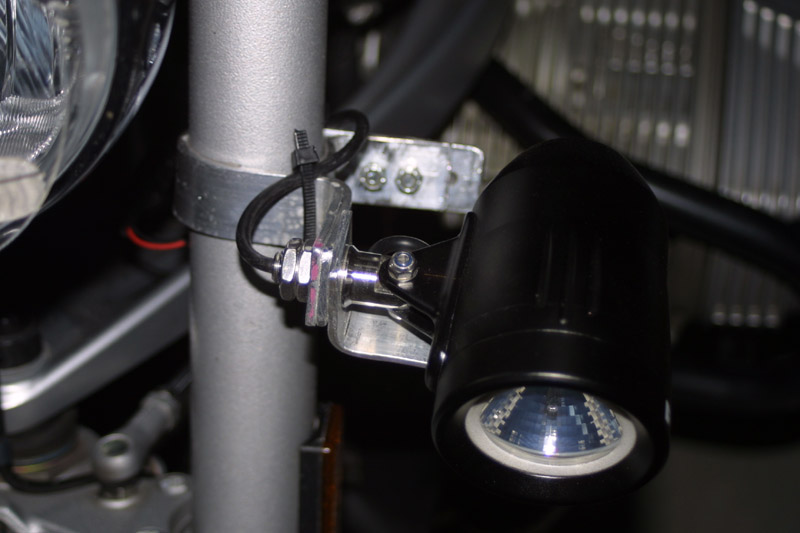
It's not the pretties looking mount, but it works just fine.
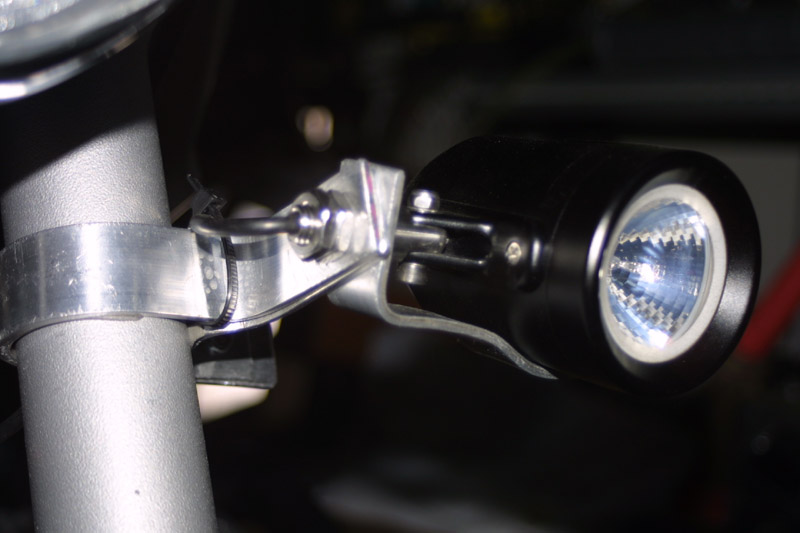
Because the light is symmetric, it doesn't effect the light pattern to
mount it sideways.
Am I afraid the light is going to fall off? Hardly. I can
wiggle the entire bike by grabbing the light mount and tugging on it.
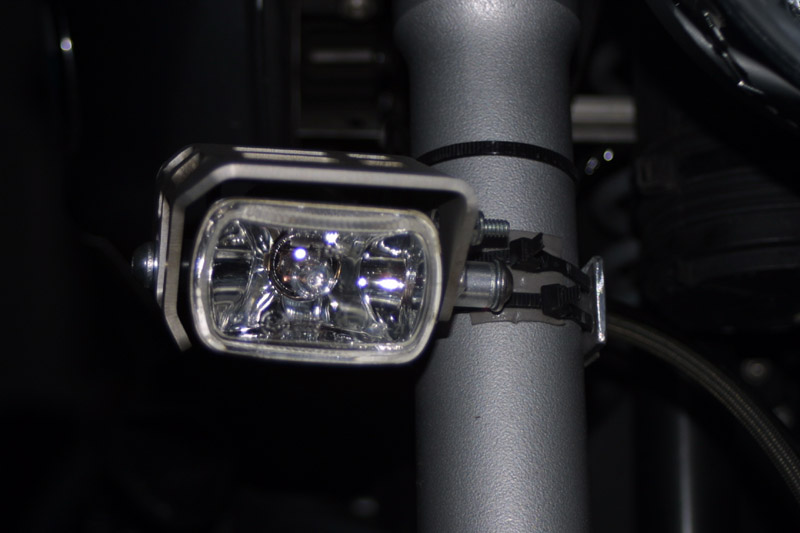
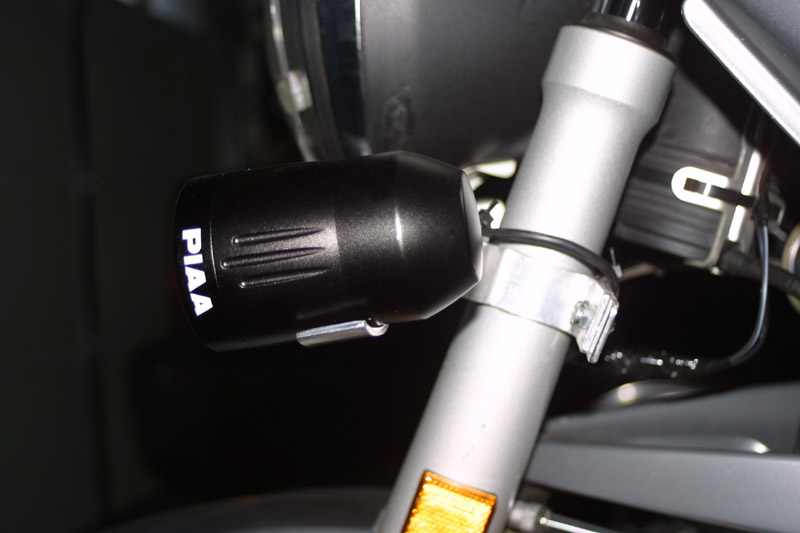
Since I have a set of the Wunderlich flood lights, held over from the
R12GS days, I decided to mount one of the flood light also.
Basically one fog
light and one focus beam light. That should do pretty good.
This picture shows how much I trust 3M double sided outdoor mounting
tape.
Is it cheese? Oh yeah baby! It has to be one of the
cheesiest light mount in the world.
Now this is what you call a home grown auxiliary light mounts. I
don't think it can get any more home grown than this. Aluminum,
screws, nuts, tie wraps, and double sided outdoor mounting tape.
What
more could any fixer upper guy ask for?
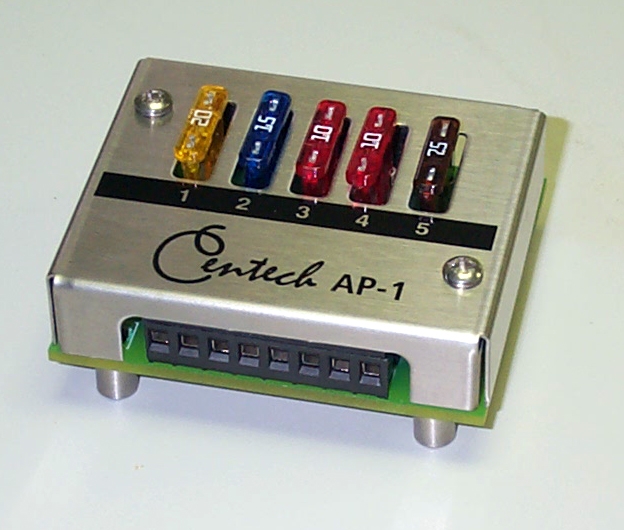
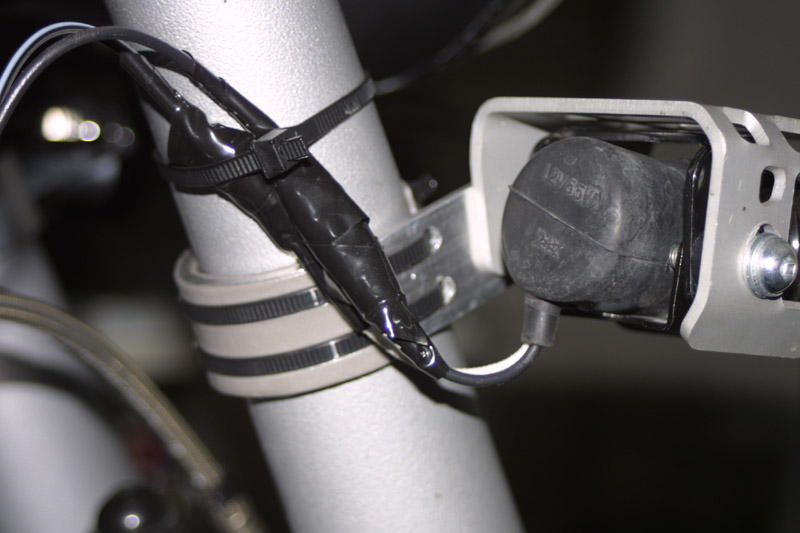
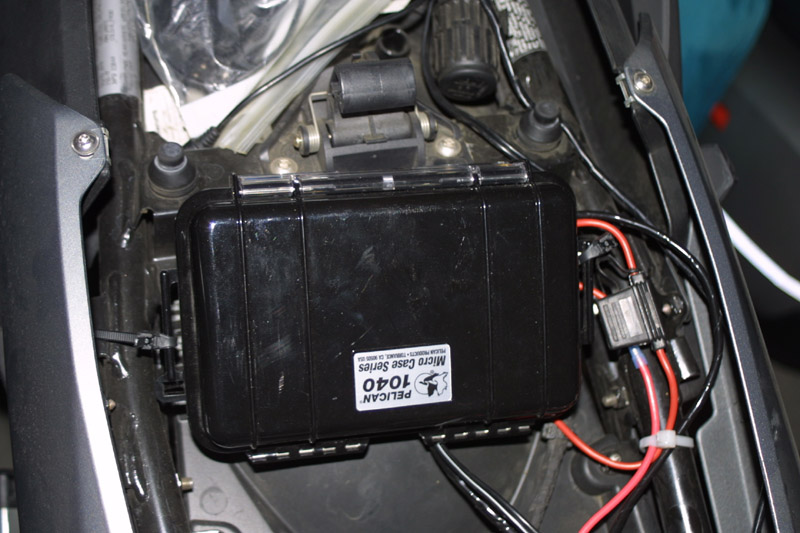
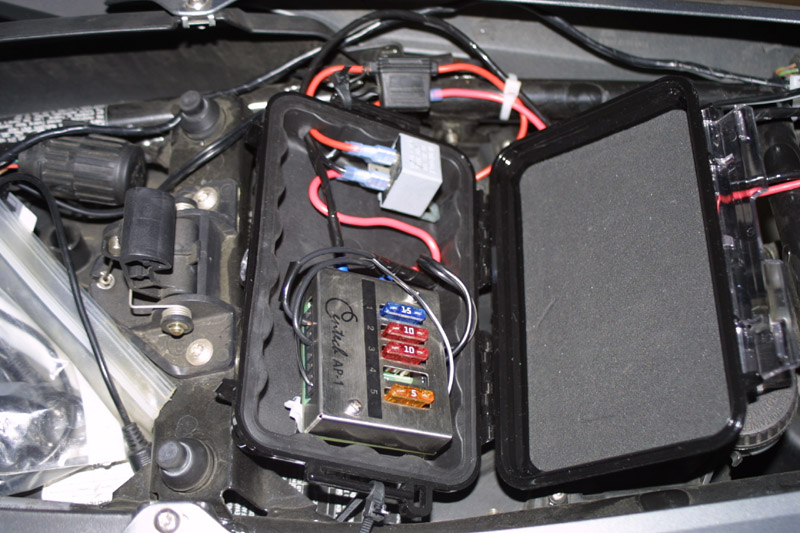
As for the electrical, I still have the Centech AP-1 from the 12GS days
so I put that fuse box to good use. Additionally, Pelican now
manufactures micro cases, I purchased one to put all
of the electronics into. This way I don't have to worry about
rain water and dirt getting into the electronics. Yes I ride in
the rain
and I love it.
Good old AP-1. It's awesome.
The wiring is still a bit of a mess because I haven't cleaned up
yet. Once everything tests out, I'll
clean house.
I used the accessories plug power to trigger a mechanical relay
for the fuse box. This way all of my electrical stuff will be
automatically powered off when the bike is turned off. Since I'm
taking the
accessory plug for the relay, what am I going to use for accessory
power? Easy. The AP-1. Since the fuse box is hooked
up to the bike's
battery, I'm going to tap power directly from the battery. In
actuality, this is desirable. The accessory plug can only handle
around 50 watts at 4 amps. In other words, you can't drive too
much from the accessory plug. If there is too much power draw
from the
accessories plug, the CANBUS will power down the accessories power.
Later on I leveled off the Pelican a bit so it doesn't interfere with
the seat.
I've been told the 12R uses something on the neighborhood of 150 watts
to keep the bike running. Not very much. On the other hand,
the alternator is capable of generating 600 watts output. This
means at least 400 watts of accessories power. That's
insane. The '08 and later R12GS is even better at 750 watts max
output.
However, to be on the safe side, I restrict myself to 300 watts
just in case BMW's claims are false. Now why would BMW lie about
such a thing. 300 watts? Yes 300 watts. That's still
a lot of available electrical power to plug in plenty of goodies.
I just have to tap power off of the AP-1 instead of the accessories
plug. The AP-1 makes performing such an activity trivial.
Almost like taking
candy from a baby.
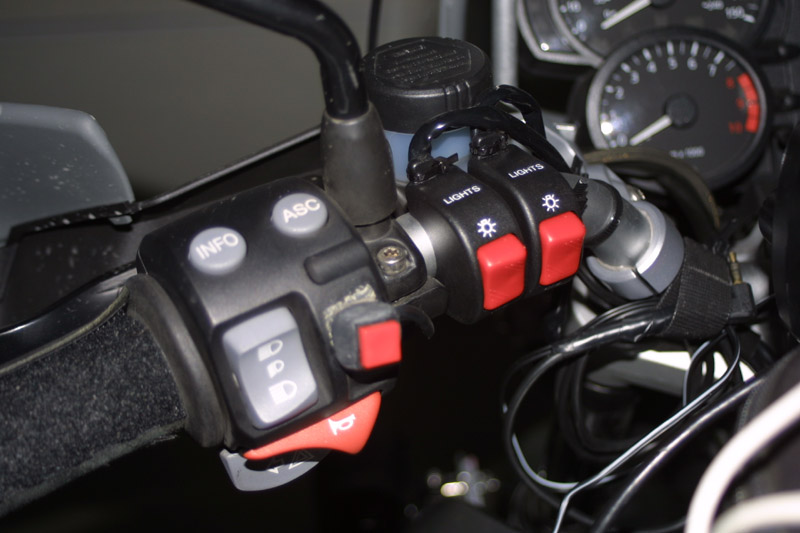
One light switches for each light. That way I can selectively
power on just the light I want. It's also good to have the HID on
a separate switch because Trail Tech recommends using the HID light
when moving at a minimum of 20 MPH. This way, if I'm sitting in
over heating traffic, I can turn off the HID and still have a decent
amount of light
with just the flood light.
I poked (drilled) a couple of holes in the Pelican mini-case to run
electrical wires in and out. Tada! There it is. When
I turn the bike key, I can hear the mechanical relay click. When
I turn the bike off, it takes several seconds and then the relay clicks
once more. It all works. Cool!
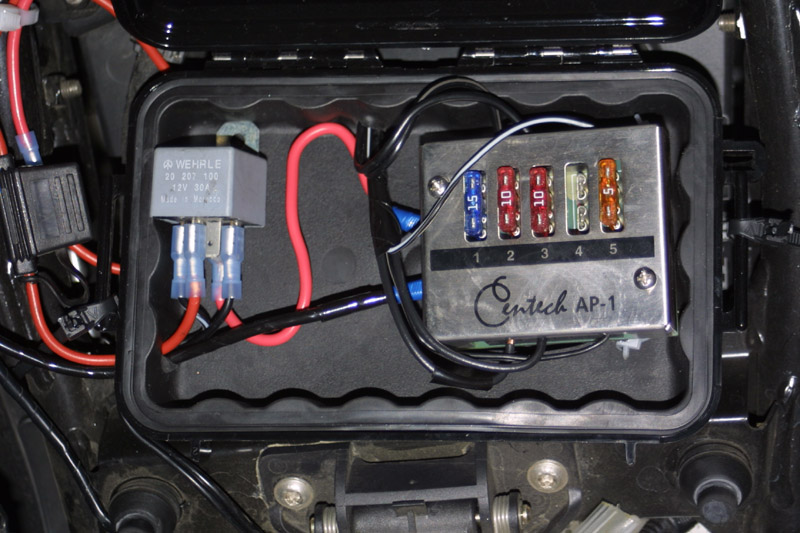
Yes, I stole the 20A fuse for the power input to the AP-1.
I have to back fill it eventually but nothing is using that fuse spot
right now.
Bla bla bla! In the end everything is together and it's time to
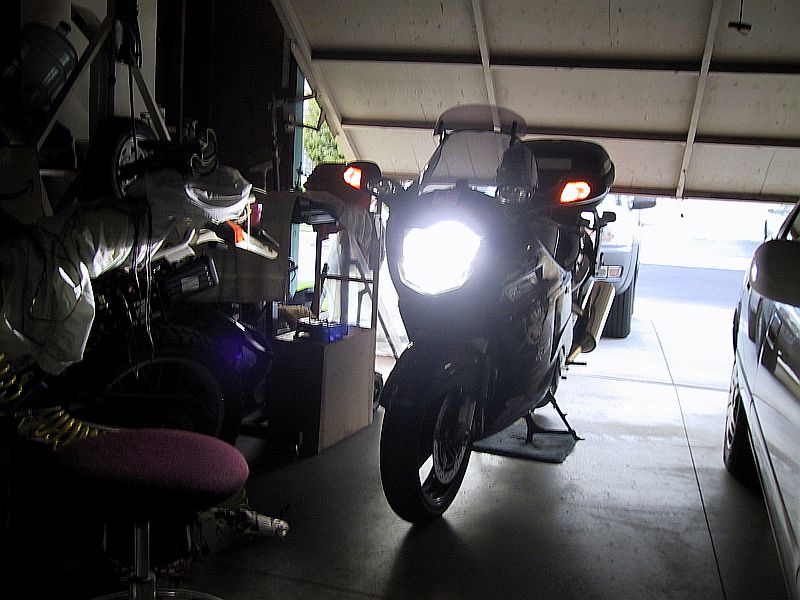
see all those little pebbles on the road in the dark.
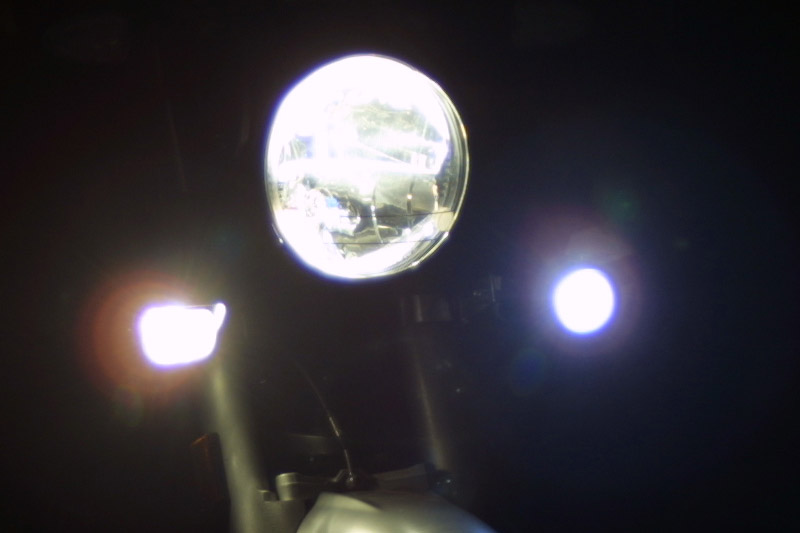
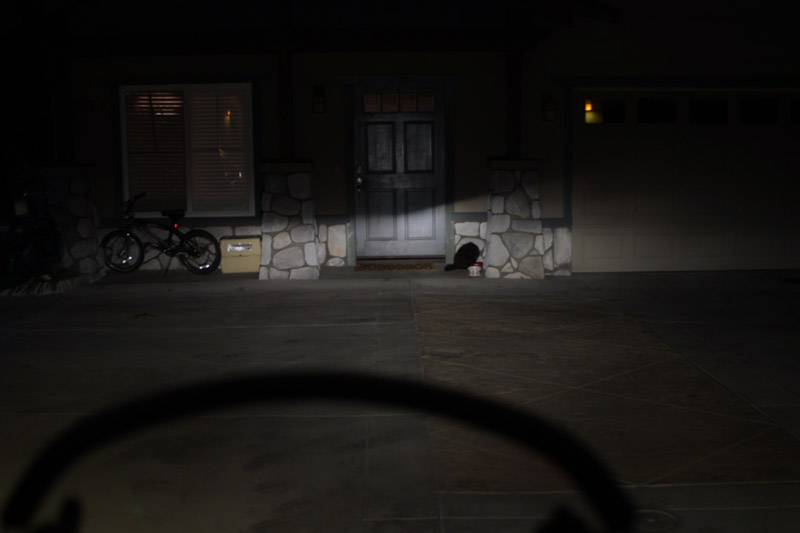
All three light are on. As you can see, the circular bluish light
is the HID.
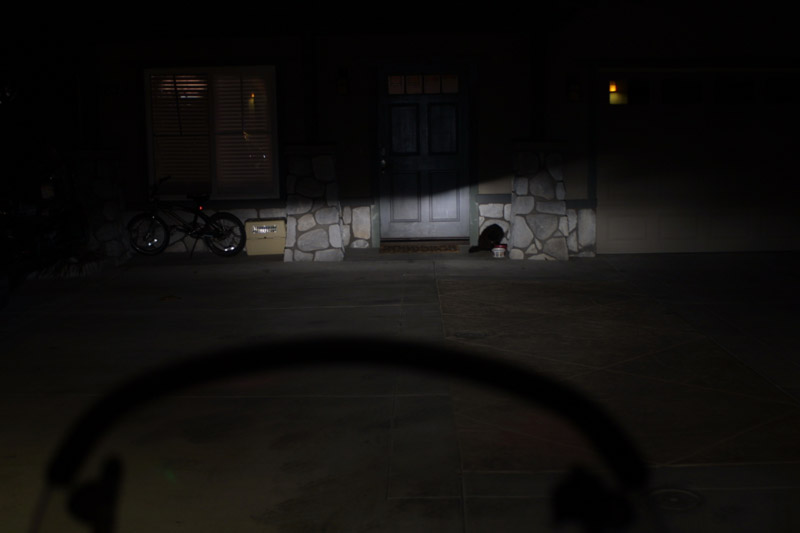
Here is the stock headlight.
The flood light is on. This helps a bit.

Now this is what I'm talking about people.
At one point I was contemplating swapping out the flood light for
another HID. In the end I decided to hold on to the flood light
and mount the 2nd HID somewhere else. Possibly on the
handlebar. Having a high mounted light will be welcome when I'm
out in the middle of nowhere and want to make it to my destination
safely on that 14th hour of riding in pitch dark.
Written on: January 16, 2009
Last modified: January 17, 2009