 Taking things off and letting it all hang out.
*** WARNING ***
The information present within these pages are for educational
purposes only. If you choose to follow these procedures and end
up damaging your BMW R1200GS, it is not my fault as it is your choice
that you follow the text describe here. Your actions are yours to
make and I, in no way shape or form, am responsible for your desire to
follow the pictures and text describe here in. The information is
presented as is and is not guaranteed or warrantied in any way.
Do this at your own risk.
*** WARNING ***
*** Note ***
It
is absolutely essential that a torque wrench be present for this
procedure. Trying to tighten anything on a R12GS without a
torque wrench is just asking for trouble. Go visit Sears if you
don't have a torque wrench. They'll be more than happy to lend
you one indefinitely for a moderate sum of money.
*** Note ***
To start with, I put the bike on the center stand.
I made sure I have a good clean area and there is a lot
of space to lay out parts as I take them off my bike. It
doesn't hurt to be anal and lay things out in a manner that I can
easily reverse the disassembly process later. If I had a bike
jack, that would be awesome. However, all I have is the concrete
garage floor. It does the job. It doesn't do my
back any good though.
The tools I'll be using for this
exercise:
- T40 torx wrench
- T30 torx wrench
- 3mm hex wrench
- crescent wrench
- torque wrench
- .15mm feeler gauge (intake)
- .30mm feeler gauge (exhaust)
- 16mm spark plug socket
- BMW primary/direct ignition coil puller ($16+ for piece of
plastic that you can't live without)
Helpful things I have but are not absolutely necessary:
- Vaseline (petroleum jelly)
- BMW TDC finder tool ($50+ dollars for a bent metal rod)
- Thread lock (blue - temporary)
Before attempting to do anything related with the valves I make sure the bike is
absolutely cold. I have let the bike cool down over
night to perform this valve work.
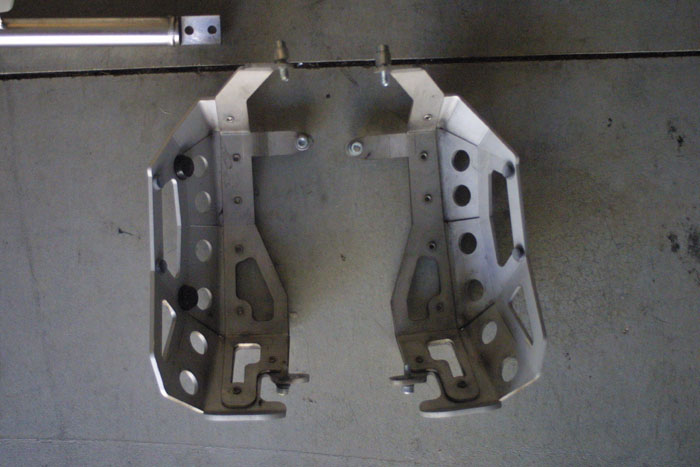
Since I have the Touratech engine guard and the Touratech head guard
(over kill), I have to remove those items before starting
anything.
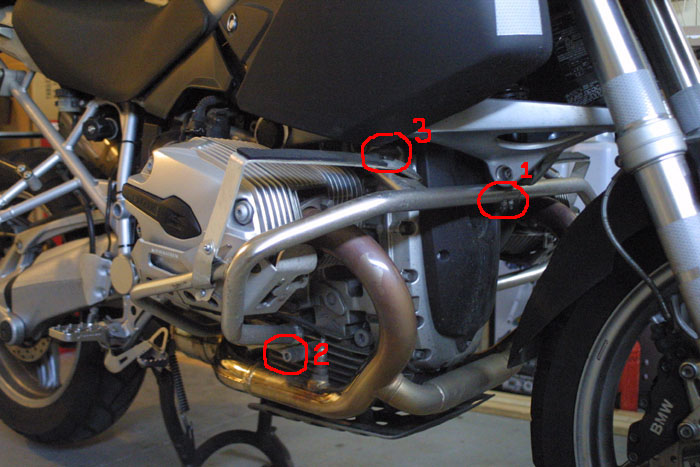
2. Main engine guard bolt. Right
side and left side. Screws 3 and 4.

3. Top screw. Right side and left side. Screws 5 and 6.
Even though I have listed the screws in this order, I don't necessarily
unscrew things in this manner. I just make sure the engine guard
is secure enough that it
doesn't crash to the ground as I remove it.
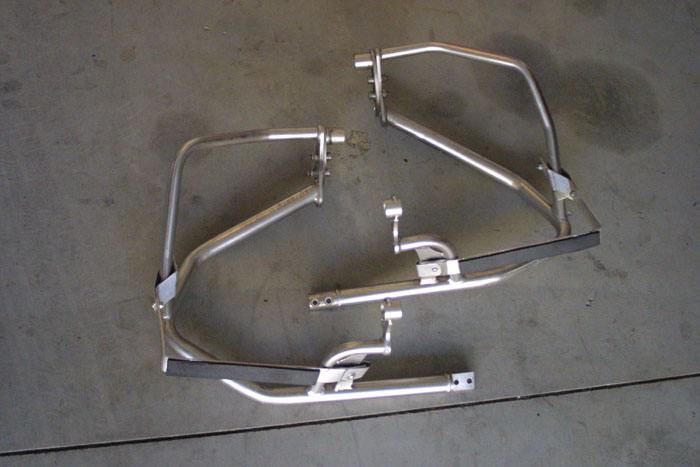
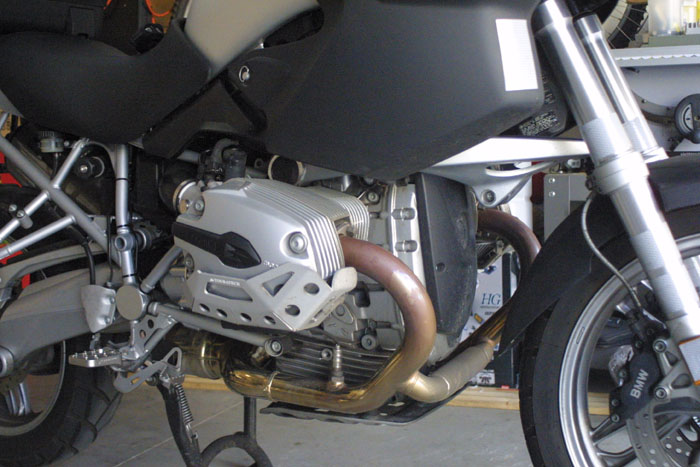
Engine guard removed.
It didn't take long to remove the engine guard. About 10
minutes. Not bad. Next I have to remove the head
guard. I won't be putting the head guards back on as it is really
not needed when the engine guard is in place. I wanted to make
sure the 12GS is well protected but eventually felt that the head guard
us just sitting there when the engine guard is in place.
Not only that, it's adds weight.
Three screws later (per each head) and the head guard is off.
Head guard.

Engine guard and head guard. Notice my super spiffy home grown
highway pegs are still on the engine guard.
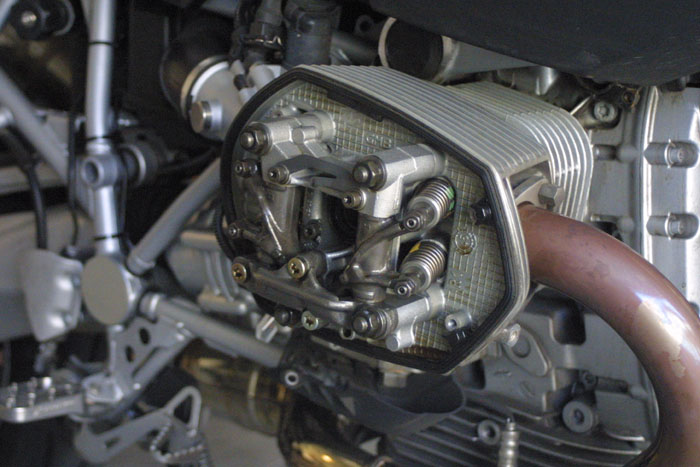
Now it's time for the real operation. First thing's first.
I have to get the ignition coil cable cover off. I haven't done
this in a
while so I had to relearn where the key spot is to remove the
cover. Actually,
all I have to do is insert a flat head screw driver (the one that is
supplied in the wimpy tool bag that comes with the R12GS will do fine)
at the area right before the spot where the cover makes a 90 degree
bend.
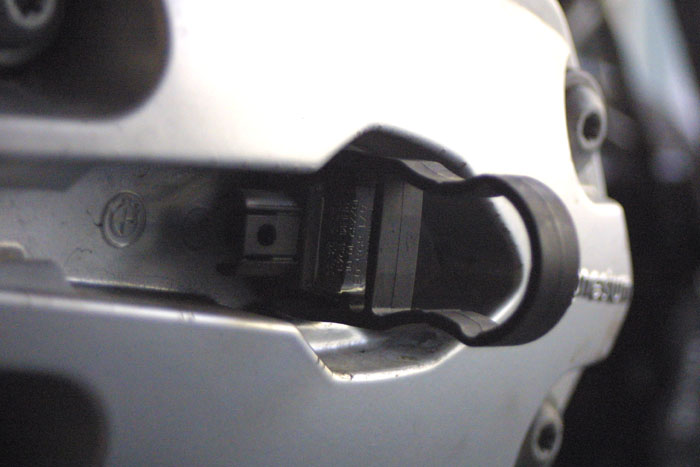
I insert the screw driver and apply a little leverage. The cover
pops right off.
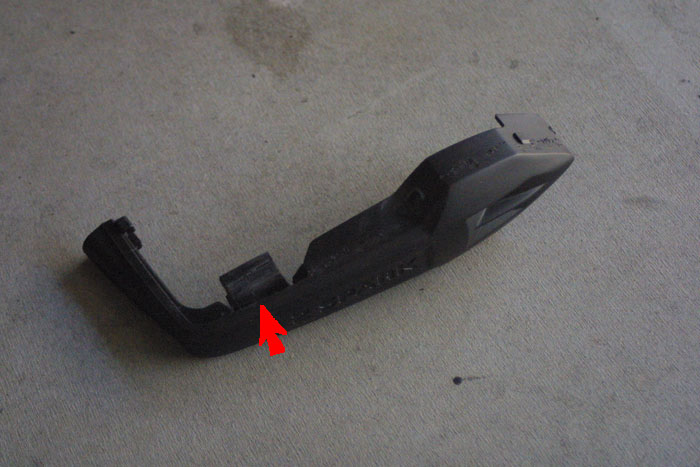
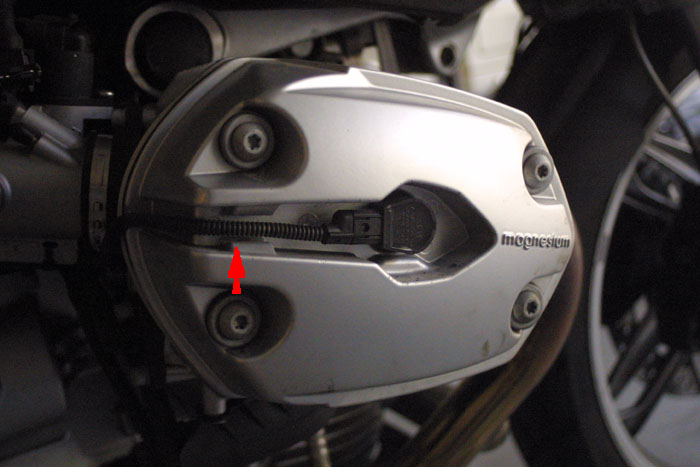
Approximately where the red arrows point.
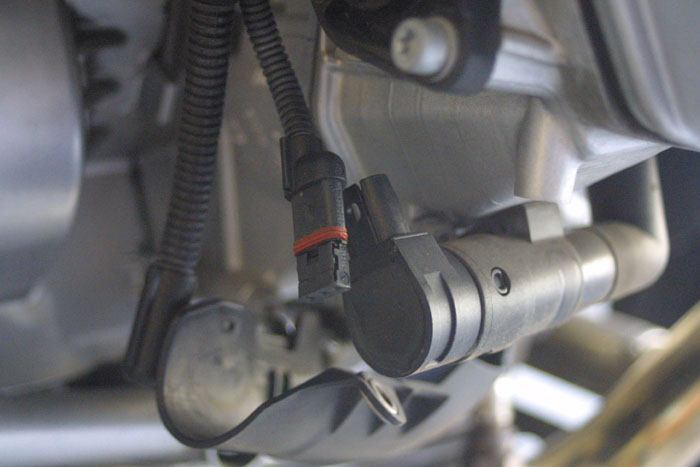
I do the same for the other head. Now I have to disconnect the
ignition cable. This can be done using a small screw driver to
ever so lightly lift the latch on the primary/direct ignition
coil. I'm very gentle here. I don't want to over torque
anything and
cause the latch on the primary/direct ignition coil to break. If
it does break, that means I'll have head to my nearest BMW
dealer for a replacement primary/direct ignition coil. That would
suck. I don't know how much the part cost as I have never
purchased a replacement, but it's can't possibly be cheap.
I do the same for the left head. Again, I'm very careful and take
my time.
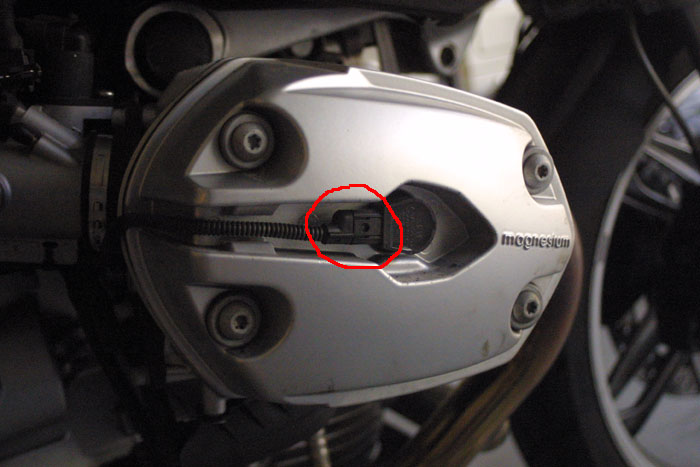

Yes, my left head cover is scratched. I dropped my 12GS on the
second day I got it. Bummer but life goes on.
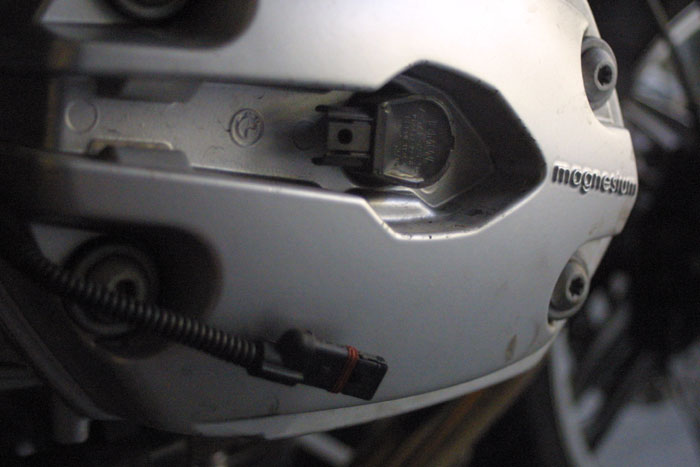
It should look something like the picture below.
Next, I will remove the cover for the secondary ignition coil
using the T30 torx wrench. Two screws total on each side.
I'm careful here as
well because the oxygen sensor wires are also attached to the cover for
the
secondary ignition coil. I make sure to be graceful and not use
any excessive force.
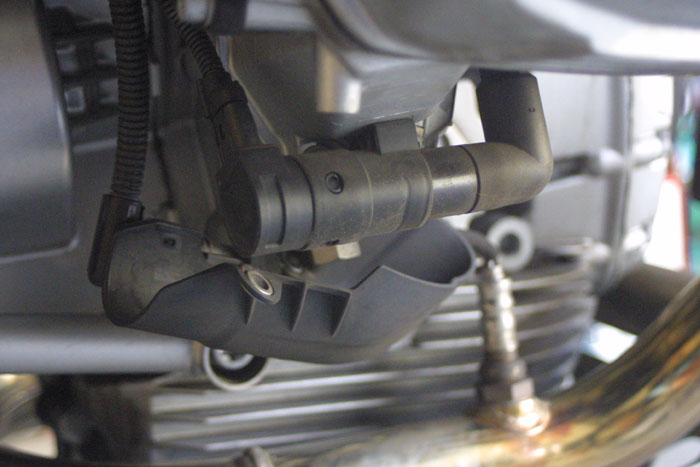
I move the cover out of the way but I make sure not to effect the
oxygen sensor
wiring.
At this point I'm ready to disconnect the ignition cable for the
secondary ignition coil. The wire's connector is the same as the
primary/direct ignition coil. Again I use a small screw
driver to ease the latch up so I can pull the connect off. Once
again I'm careful
not to damage the latch on the secondary ignition coil. The
ending result is something like this:
The cool thing about the ignition coil
connectors, they're keyed. I can't possibly mess up when I
reattach everything.
While I'm down there, fidgeting with the secondary ignition coil, I
went ahead and disconnected the secondary ignition coil from the spark
plug. This can
be done without any tools. A slight tug on the secondary ignition
coil will have them come right off. I hear that wonderful
popping sound when the ignition coil comes off.
The primary/direct ignition coil is not so easy. I need a
special tool from BMW to remove these babes. I purchased the
puller from Brown BMW dealer in Pomona a while back when I did my valve
check for the 600 mile break in. The version I have is a small
plastic tool. I've seen other versions of the tool but this
is the one the dealer sold me. It works well enough I guess.
On to the primary/direct ignition coil it goes. This one has a
tendency to slip as the primary/direct ignition coil is extremely well
connected. I swear there is a vacuum to contend with when it come
to
removing the coil. BTW, swearing is allowed when I try to pull
the primary/direct ignition coil. It was a pain to
pull off. Eventually it comes off after several slips of the
tool.

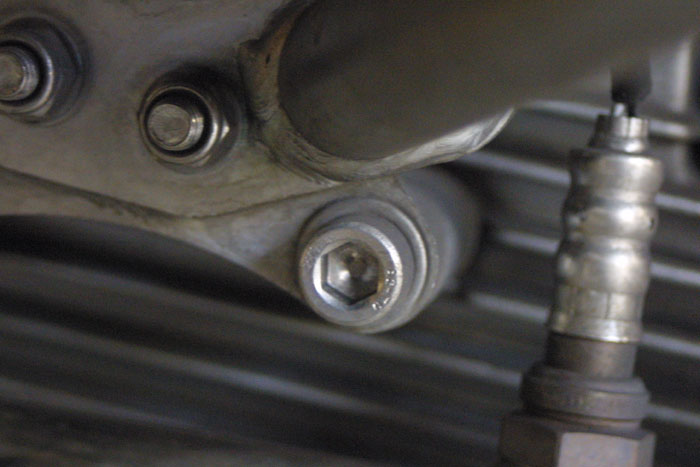
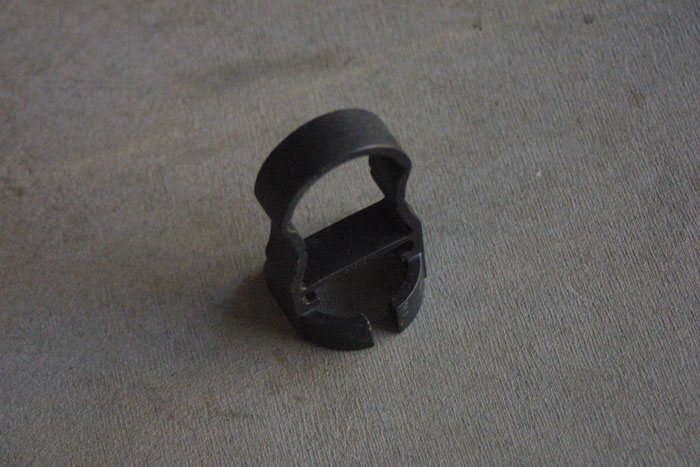
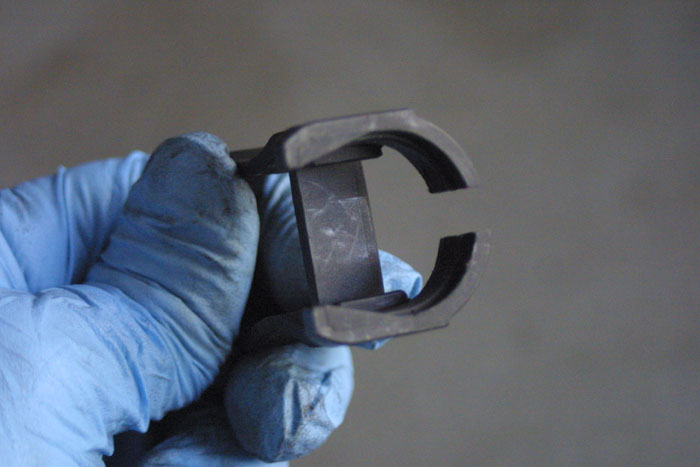
Here is what the tool looks like when it's seated on the primary/direct
ignition coil.
It's oh so sweet when I hear that final popping sound as the
primary/direct ignition coil comes out. Now I have a direct line
of sight to the primary spark plug and the secondary spark plug.

If you look hard enough, you'll see the spark plug sitting inside.

Secondary spark plug.
Now comes the 16mm socket to remove the spark plugs. I attach the
socket to a wobble ratchet extender and remove the primary spark plugs
from both heads. When it comes to the secondary
spark plugs, I had to use some Vaseline on the outside of the socket in
order for the 16mm socket to slide inside the hole and unscrew the
spark
plugs. I'm gentle on the plugs as I don't want to damage the
porcelain on the plugs. A little bit of effort and the
plugs are all out. I inspect the plugs to see if there is
anything strange about how the engine has been firing. The plugs
are white with a little brown to them. An indication that the
bike is still running lean. That's fine I guess as I really don't
have
any control as to how rich the bike should be running. I didn't
install one of those fancy gadgets to allow for high altitude running.
I'm not putting in new plugs this time but will for sure the next valve
adjustment round.
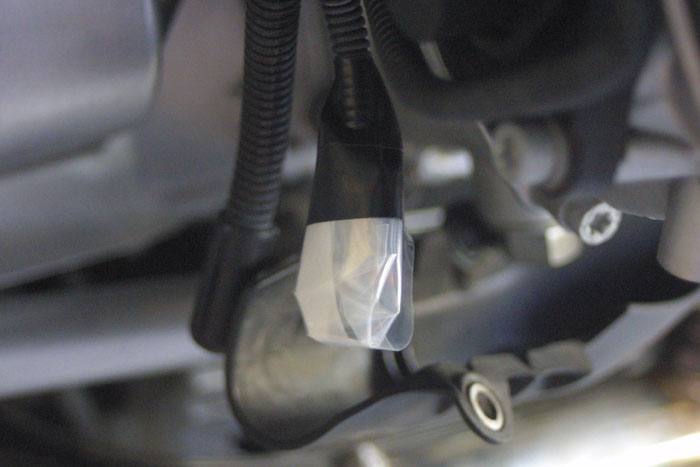
The next thing I do is to cover all of the ignition cables with plastic
and electrical tape to keep them clean and to prevent any oil from
coming in contact with the cable. This step is probably not
necessary but it doesn't hurt to spend an extra couple of minutes to
make sure things are protected.
Now I'm ready to remove the head
covers. I use the T40 torx wrench to loosen the head covers.
I made
sure I have something to catch oil coming out of the head
covers. I estimate the amount of oil loss is in the neighborhood
of 1/2 a quart for both heads total.
When I unscrew the head cover bolts, I only unscrew
the bolts until I can pull them away from the head cover. There
is no need to remove the bolts themselves.

Unscrew just enough to...

Pull them out.
Next I give a little heave and a little ho and the head cover come
right
off. Yes, oil goes all over the place.
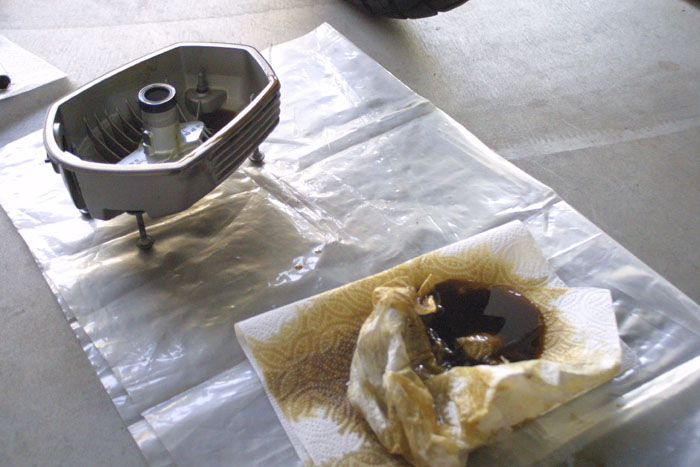
Here's an example. A pool of oil. This is just the left
head.
Now I can see it all hang out. Pretty cool if you ask me.
Main page
Page 2 - Tweaking the valves.
Written on: February 18, 2007
Last modified: February 19, 2007