The information present within these pages are for educational
purposes only. If you choose to follow these procedures and end
up damaging your BMW R1200GS, it is not my fault as it is your choice
that you follow the text describe here. Your actions are yours to
make and I, in no way shape or form, am responsible for your desire to
follow the pictures and text describe here in. The information is
presented as is and is not guaranteed or warrantied in any way.
Do this at your own risk.
*** WARNING ***
*** Note ***
It
is absolutely essential that a torque wrench be present for this
procedure. Trying to tighten anything on a R12GS without a
torque wrench is just asking for trouble. Go visit Sears if you
don't have a torque wrench. They'll be more than happy to lend
you one indefinitely for a moderate sum of money.
*** Note ***
Now that both head covers are off, I need to put the bike into
the highest gear in order to move the valves around to their desired
location for valve adjustment. I slowly shift the bike from
neutral all the way to 6th gear. In between gear shifts I move
the rear wheel a bit to helps facilitate gear shifting.
Once there I'm ready to move the heads through their 4 strokes to
eventually get the TDC (Top Dead Center). Of the 4 strokes only
the TDC is the time when all four valves on a head is closed. The
other three strokes operate the valves in one fashion or another.
When I'm ready to move the heads, I rotate the rear wheel in the
backward direction. If I do enough of this, I'll be a strong man
in no time. It take quite a bit of effort to move the
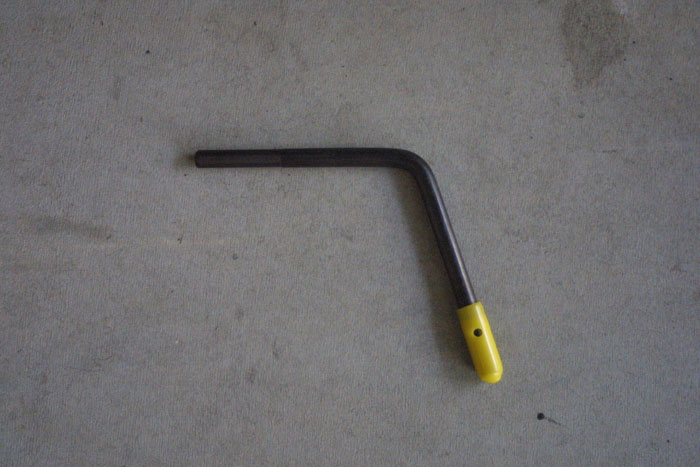
wheel. I have the BMW TDC tool, this means and I can easily find
the heads' TDC.
BMW TDC (Top Dead Center) tool
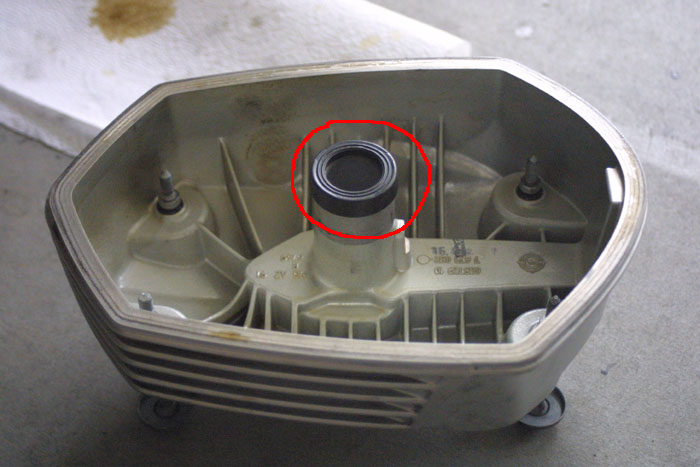
In order for me to find TDC with this tool, I simply rotate the wheel
until the point where I can insert the TDC tool all the way into an
opening on the back of the engine.
Before when I didn't have this tool, I would resort to a more primitive
method of finding the TDC. One method is to insert a long object,
like a pencil, into the primary spark plug hole. As the cylinder
head moves up towards the top, the pencil will be push outward.
However, I have to get the proper stroke. The TDC stroke is when
the engine fires. All valves are closed. As I rotate the
rear wheel I hear the valves open and close. Eventually I hear a
stroke when there is no hissing and sucking. That is the firing
stroke. Also, when I have found the TDC, I can place the feeler
gauges between the valve stem and the rocker arm. If it was one
of the other three strokes, I wouldn't be able to do this.
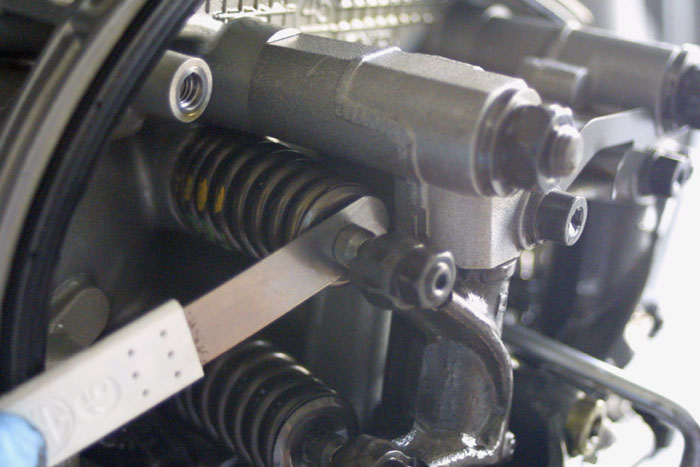
Once I have achieved TDC, I'm ready to perform the valve
adjustment. However, before performing any adjustments, I use the
feeler gauge to see if the valves need adjusting. When I slide
the feeler gauge between the valve stem and the rocker arm, the feeler
gauge should move but still have a little resistance. If no
resistance can be felt, that means I need to adjust the valve. I
repeat the feeler gauge process to see if any or all of the valves need
adjusting. This time around they're all a loose and need
adjustment.
I use the .15mm feeler gauge for the intake valves (the 2 valves
towards the rear of the bike) and the .3mm feeler gauge for the exhaust
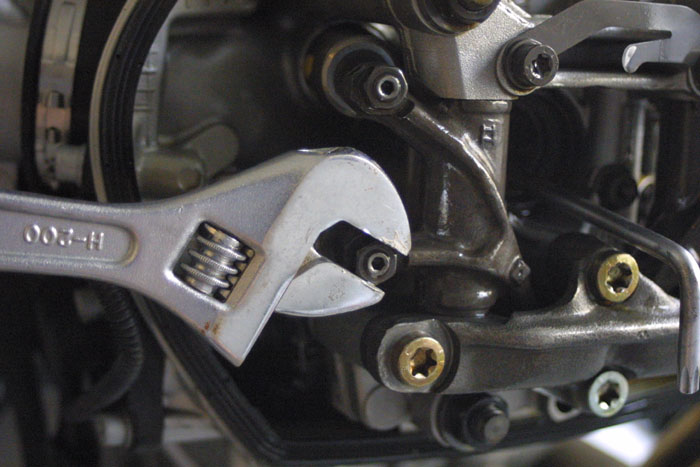
valves (the 2 valves towards the front of the bike). Since I need
to adjust the valves, I use the crescent wrench to loosen the rocker
arm lock nut.
Notice the T30 torx wrench sticking out of the cylinder head as a
secondary confirmation of TDC.
An alternative method to the crescent wrench is to use a 10mm socket or
10mm open wrench. Once the nut is loose, I then use the 3mm hex
wrench to finely tune the adjusting screw on the rocker arm so that the
feeler gauge has that slight resistance when it is moved between the
valve stem and the rocker arm. It is better to use an open wrench
to perform the initial tightening of the lock nut on the rocker
arm. I tighten the lock nut just enough to prevent the adjusting
screw from moving. I don't want to over tighten here as the lock
nut is suppose to be tighten to 8nm with a torque wrench. I
repeat the adjustment for the remaining 3 valves on the right
head. As the last tightening step, I take my torque wrench and
set it to 8nm. With a 10mm socket I tighten all of the lock
nuts. Before declaring the valve job done, I swing around one
last time and check all the valves with the feeler gauges, once
more. If everything is still to specs, I'm done. If
something is too tight or too loose, I readjust the valve in question
once more. It can't be over stated that it is important to come
back once or twice more to make sure all adjustments are within
tolerance.
When all is done, I'm searching for the TDC on the left head.
Once again, the TDC tool helps a lot. When TDC is reached, I
repeat the above procedure for the left head. Although there are
only two heads to contend with, it still takes me a while because I
want to make sure I do things right. Again it's easy for the lock
nut to over tighten the adjusting screw on the initial open wrench or
crescent wrench tightening.
I only have to deal with two heads (8 valves). I feel sorry for
the people that have to deal with 4 heads (e.g. 16 valves).
Now that both heads are done, I reverse the process that was use to
take the head covers off. One important thing I noticed. I
make sure the spark plug hole gasket is on the head cover and not stuck
on the head itself. If the spark plug hole gasket is on the head,
it makes putting the head cover on a little, if not, a lot difficult.
The other large gasket can remain on the head. In fact, it has to
be on the head because that's how it's mounted. The remaining
steps go pretty quickly.
I reinstall the head covers and tighten the bolts in opposing diagonal
order. The head covers are tightened to 10nm with the torque
wrench. Next comes the installation of the primary and secondary
spark plugs with the 12mm socket. The spark plugs are installed
at 23nm. The primary/direct ignition coils and the secondary
ignition coils is then hand installed. I make sure to push the
primary/direct ignition coils forcefully onto the primary plugs.
I don't want any air gaps to prevent the engine from firing. I
then install the secondary ignition coil on the secondary spark plugs
in a similar manner. Now I remove my handy-dandy
plastic/electrical tape ignition wire covers, that I created, and
connect the ignition wires to their respective ignition coil. At
this point I take the bike's gearing back down to neutral and start the
bike up. If all is done properly, my bike should start up and be
humming along instead of sounding like a large sewing machine.
Surely enough it start right up and everything is cool.
That's pretty much it. The only thing left for me to do is
install the primary/direct ignition coil cover, the secondary ignition
coil cover, and the Touratech engine guards.
I hope you have found this document interesting. I never thought
I would be so mechanically inclined as to perform a valve adjustment
job. Once I have over come the initial intimidation from the veil
of mechanical obscurity, I found out it is not such a hard
process. On the other hand, I steer clear of computer and
electrical jobs.