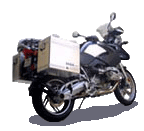
Wunderlich Micro
Flooter light Page 2
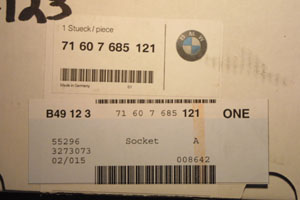
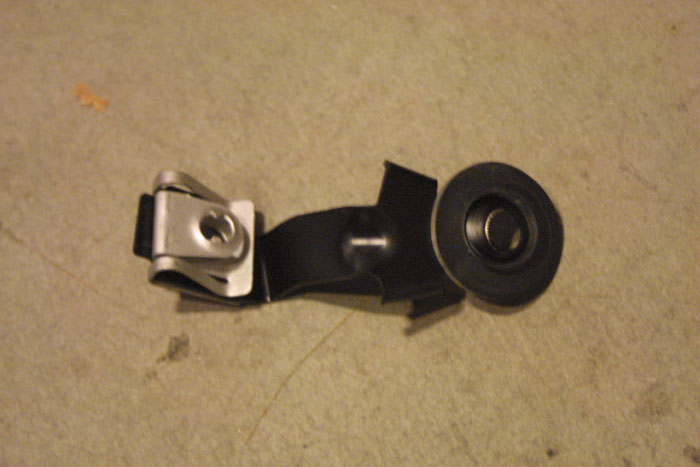
Well, the BMW accessory plug kit finally came. Here is the part
you're really looking for. Make sure this is the one you get or
you're getting when purchasing your own Wunderlich Micro Flooter Light
kit.
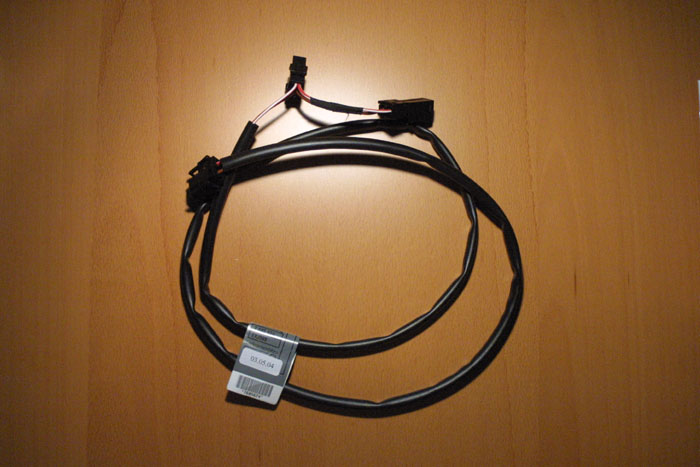
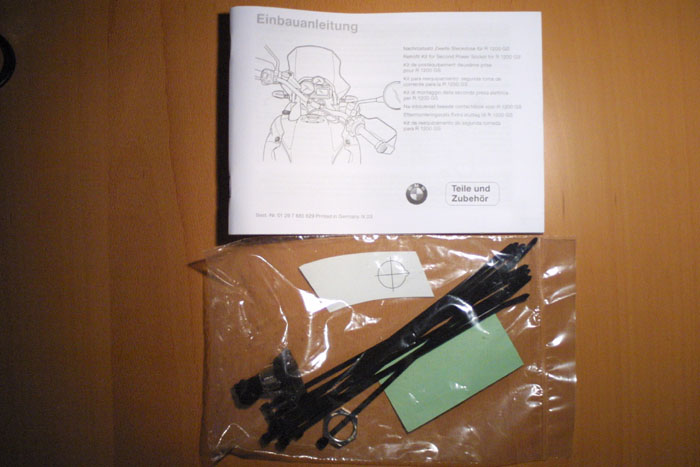
Here is what comes in the kit
Now it is time to prep the bike for installing this Accessory Plug
Kit. It is not hard to install the plug. The only real
hassle is removing the gas tank to get at the electronics underneath
it. If your bike already has the accessory plug installed on it,
you can skip this page and go on to the third instructions for
installing the Wunderlich light kit itself.
...
So here we are, after a week of time off goofing around on the computer
not doing much except for playing freecel.
It is time to go back to work. I rode the GS to work on Tuesday
January 3rd, 2006 and guess what ... I'm down to less than 1/3 of a
tank by the time I get home from work. It's time get off my fat
bee-hind and install the accessory plug kit and the lights.
The thought of having to pull the tank still kind of put me off but it
turns out it's a lot easier than you think. If I can do it, you
can do it too. So here we go...
The idea here is to install the accessory plug at the front of the
bike. BMW gives you the accessory plug at the back of the bike,
but it won't do you any good all the way back there for a set of light
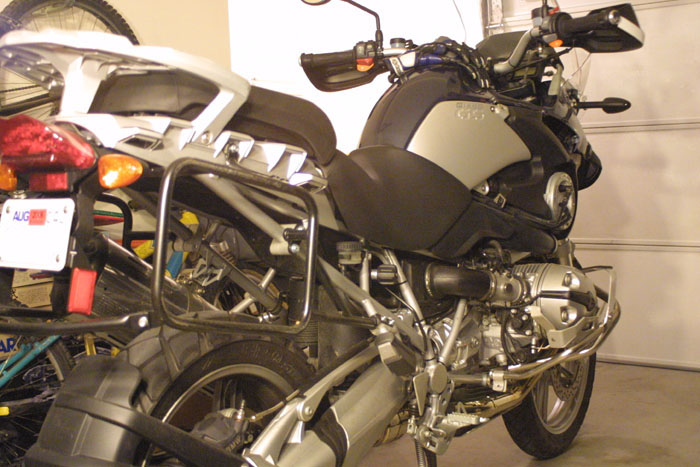
at the front. First thing's first. I pull both panniers
off, and remove the side fairings exposing the fuel lines connected to
the fuel tank.
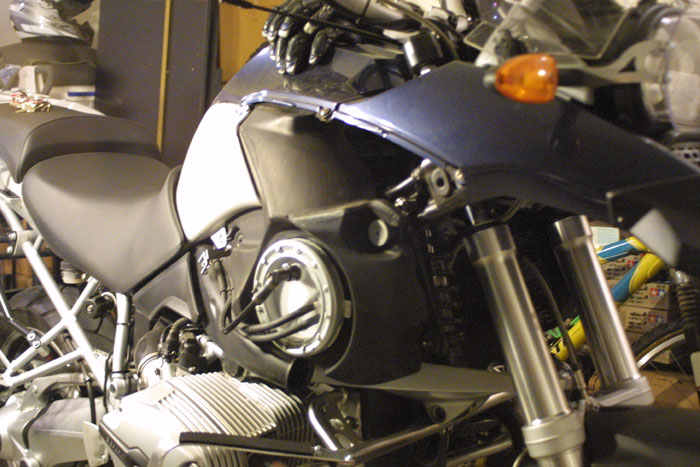
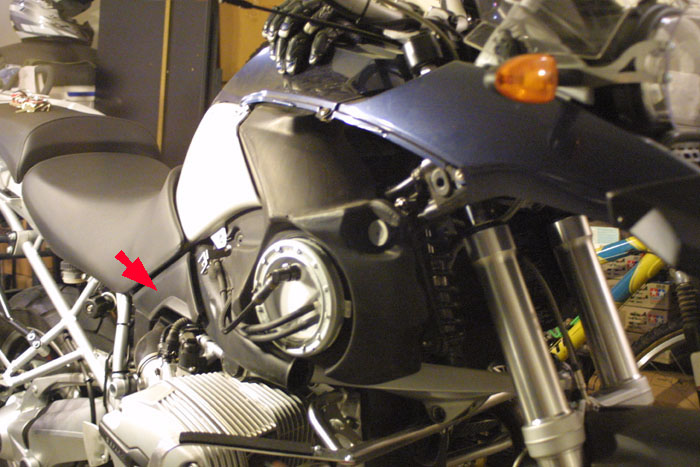
I then remove the pillion and driver seat and disconnect the negative
power lead from the battery. A minor warning, when you disconnect
the battery, the computer will loose all trip mileage
information. The trip odometer will be reset to 0.
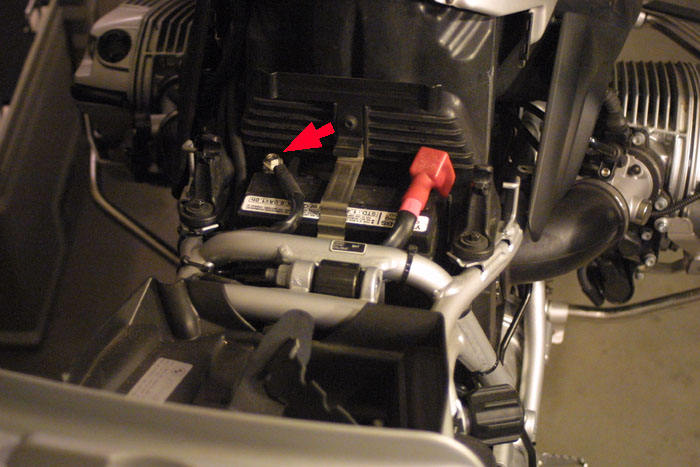
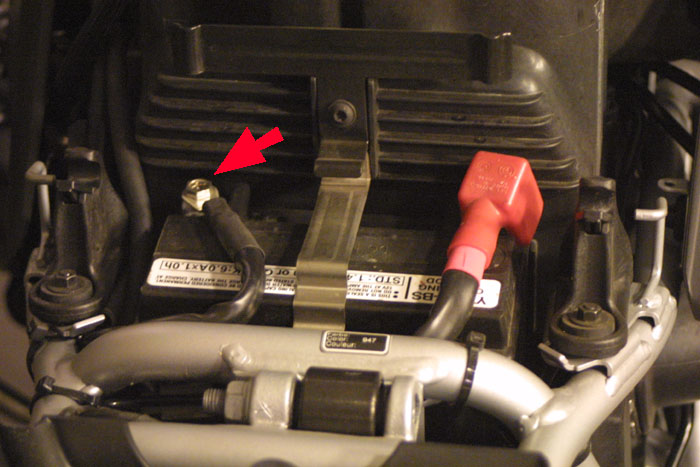
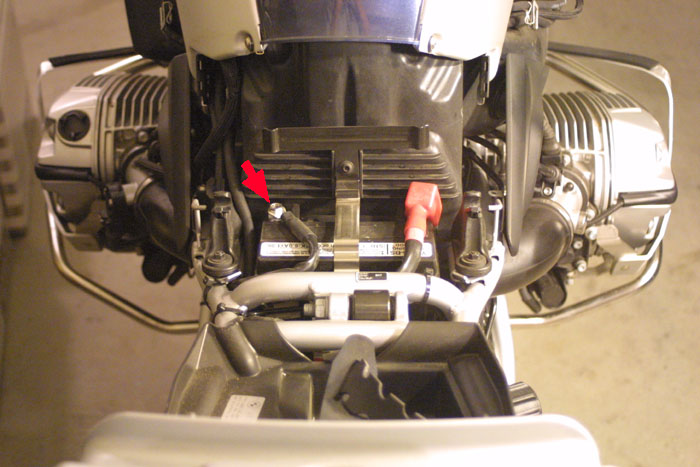
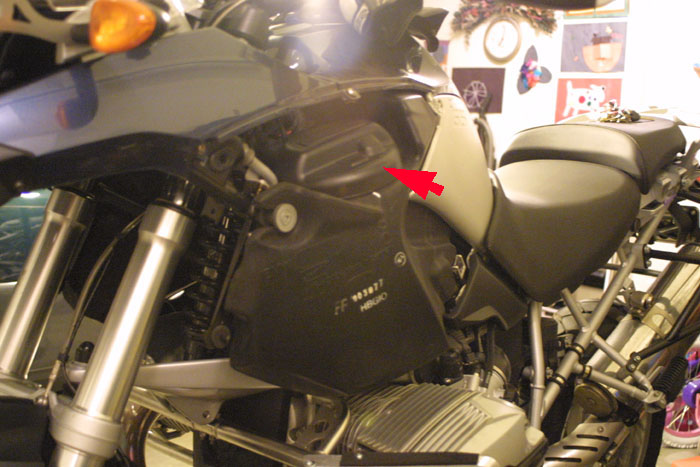
How many possible vantage point can I show this and would you think
the red arrow point to the negative power lead?
BTW, a 10mm open wrench will easily remove the nut for the battery
lead. Actually, I can't emphasize enough to disconnect the proper
power lead. Next up, removing the lower side panel around the
driver's knee area.

Left knee panel removed.
Right knee panel removed.
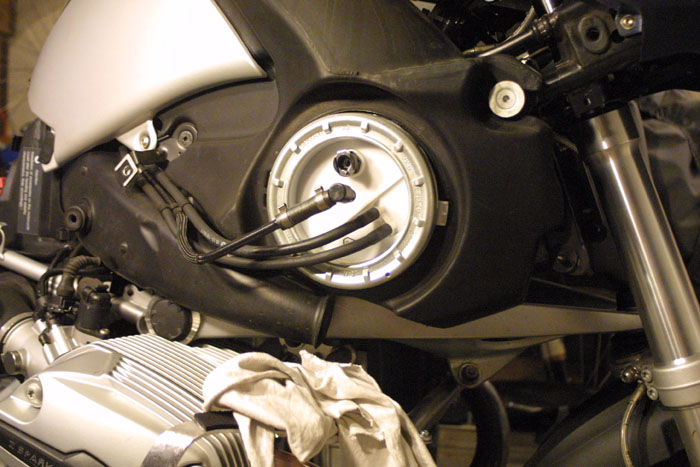
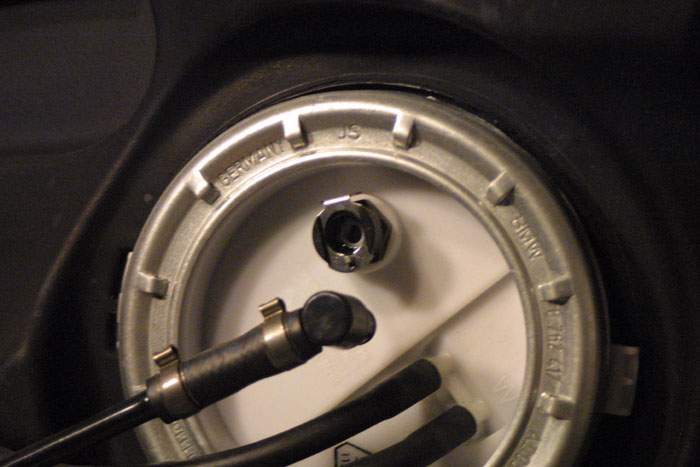
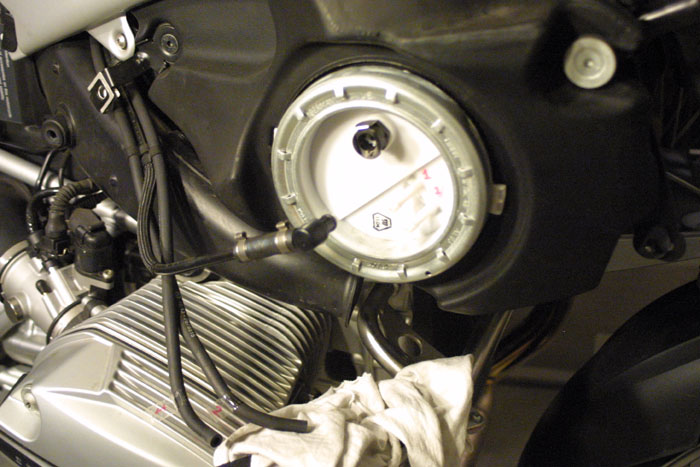
Now we remove the cap for fuel pump.
Here is where I have to hand it to BMW for being so awesome about how
they designed the motorcycle. The fuel lines have a quick release
mechanism. Not a clamp on a rubber hose. It's so easy to
disconnect the fuel lines it's not even funny. Even my
grandmother can do it. The two power connects have
a small locking tab on the inside of the connector. All you have
to do is use your finger nail to pull them out a little. A minor
pull up on the connectors have them popping off without problems.
Make sure to have a rag handy when you disconnect the fuel line.
In my case it was only a couple of drops of fuel. Very minor.
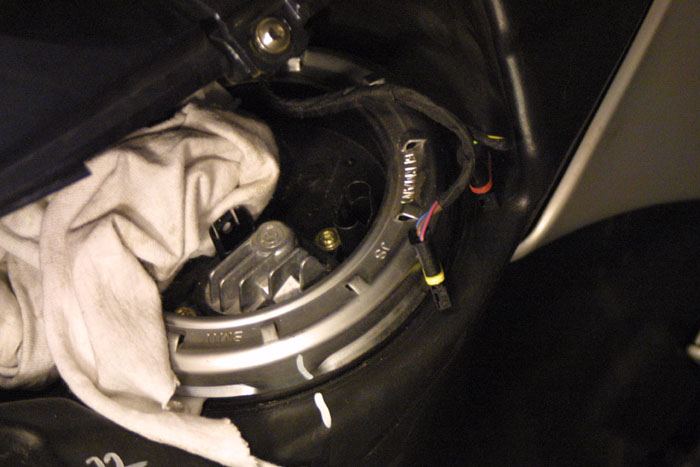
I left the rag on the fuel pump but really, there wasn't a lot of fuel
coming out.
It's there to serve as ambiance. Like I know what I'm
doing.
Actually, I do.
I can hear it already ... your thinking ... smart ass.
Next
I remove the fuel line, fuel over flow, and fuel venting hoses from the
tank. Once again, the fuel line has a quick release button.
Too cool!!!
Again, there is a little fuel coming out of the line but not
much. The rag definitely took care of it. With the next two
hoses I decided to be anal and put things back exactly the way I
disconnected them. So I went ahead and label them with some
scotch tape and a permanent marker. It took a little more effort
to pull the hoses because they were in there pretty good. I ended
using a flat head screw driver to push the hoses while I pulling them
at the same time. This was quite effective and didn't damage the
hoses.
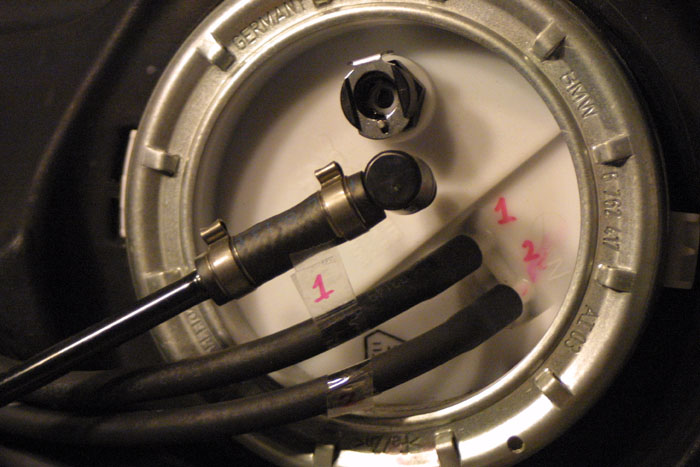
Everything is completely off. Again the rag is there for
ambiance.
Next thing to do is to remove the bolts holding the tank to the chassis
(5mm hex wrench). You also have to remove two small torx
nuts (T25) that connects the fairings together at the top of the
bike.
Here is the right side gas tank bolt and it's removal.

The bolt holding the tank to the chassis is removed.
The removed tank mount bracket.
The left side tank bolt to remove.

Bolt and spacer removed.
Note:
when putting these bolts back in to re-install the
tank. Both left and right side will require 19 NM torque
tightening
values.
There are two of these T25 nuts that you have to remove. One on
each side.
Note:
these screws will require 9 NM torque values when re-installing the
tank.
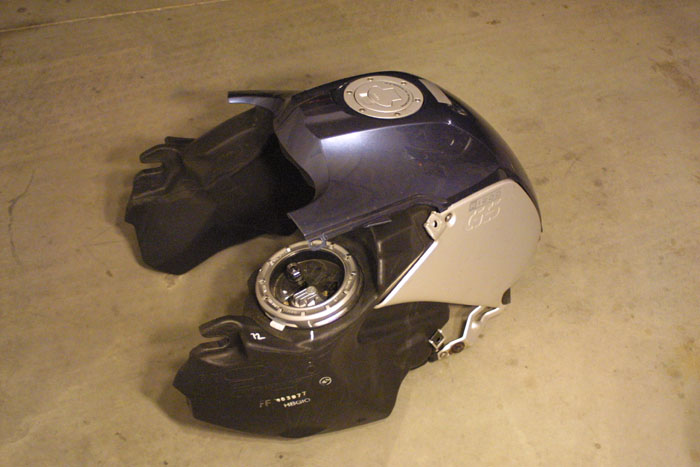
After that it's a matter of lifting the gas tank up a little from the
driver's position and then pulling the tank towards the back of the
bike. Pop goes the weasel ... you now have the gas tank in your
hands. Set it gently somewhere on the ground out of the way.
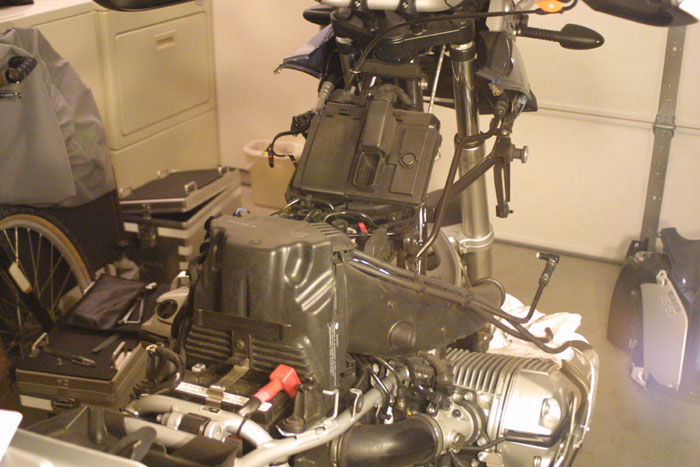
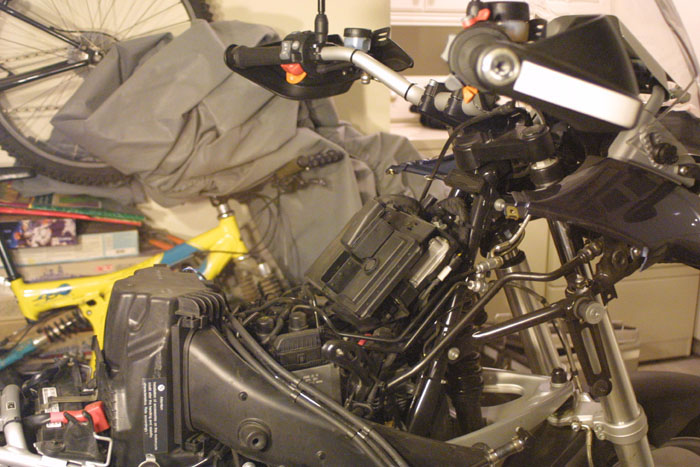
Here's how the bike looks without a gas tank. I definitely can't
ride it very far in this condition.
Now that the tank is off, we address the installation of the Accessory
Plug. One thing I did do opposite of the instructions. I
drilled the hole for the accessory plug after I removed the tank.
The original BMW instructions suggest doing this before removing the
tank. Why was I ass backwards? It has to do with the
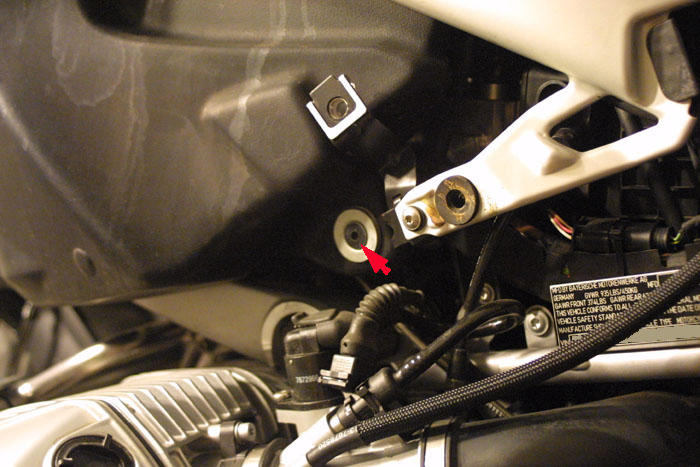
location where the plug is suppose to go. If you grab the top of
the fairing where the plug is suppose to go, you'll feel the outline of
a circle where the plug is suppose to go on the bottom. My
thought was I can
have a better look and feel where that ring was if the tank was
off. If you want to drill the hole for the plug before removing
the tank, that would be fine. As for me, everything still worked
out even though I did things out of phase. Below are images of
where I drilled the hole. BTW, one good tool to have handy is a
small round file. It does a great job of trimming the plastic
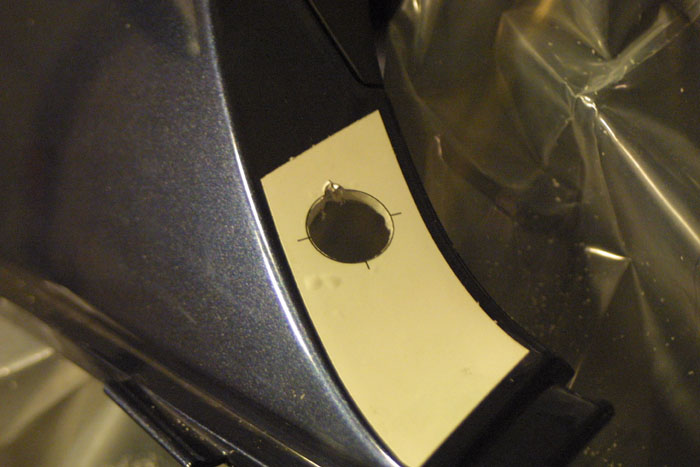
fairing and doesn't damage the finish.
It's also a good idea to put a plastic cover over your bike where
you're going to drill and file down the plastic. It can get
awfully messy.
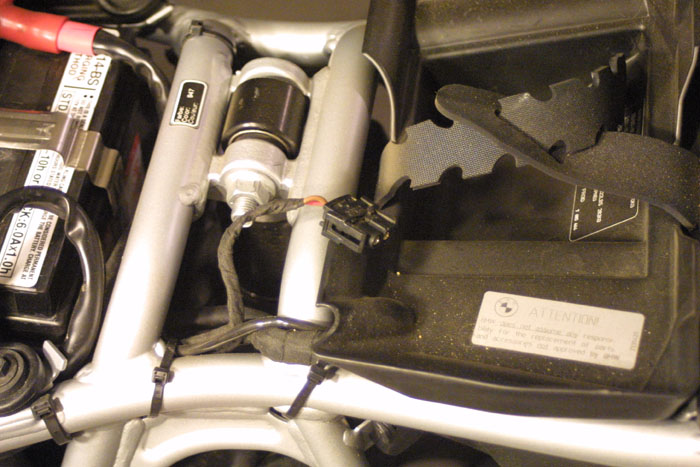
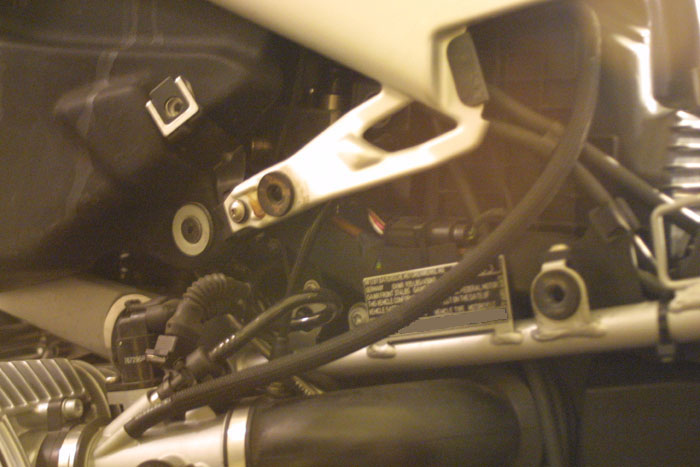
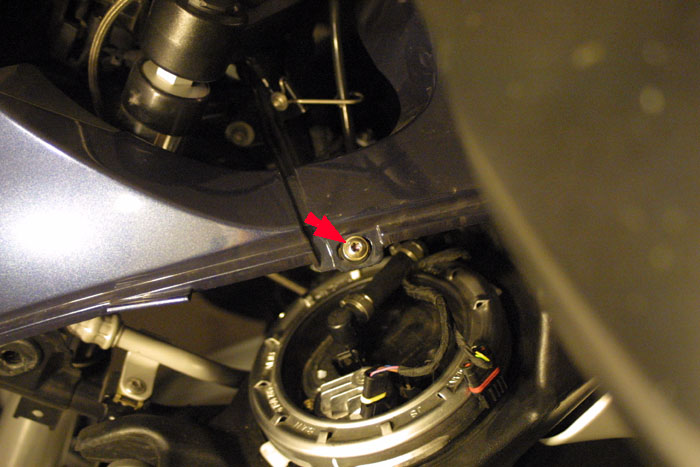
Ok, here's the deal. What you need to do once you're finished
with drilled the
hole and installed the plug, you will need
to find the on board accessory plug toward the rear of the bike and
patch the new accessory cable that came with the accessory plug
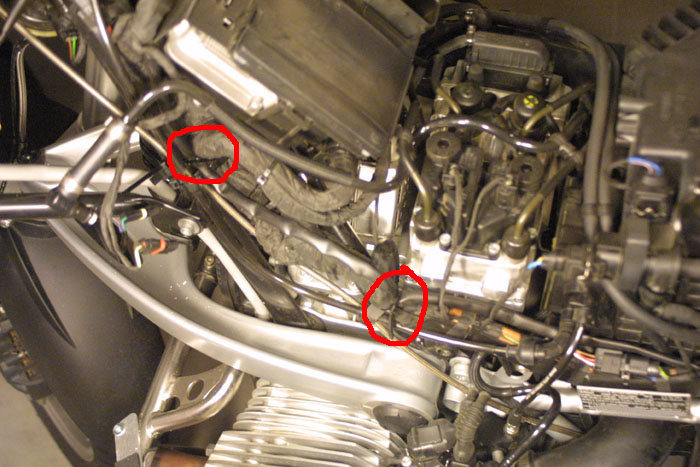
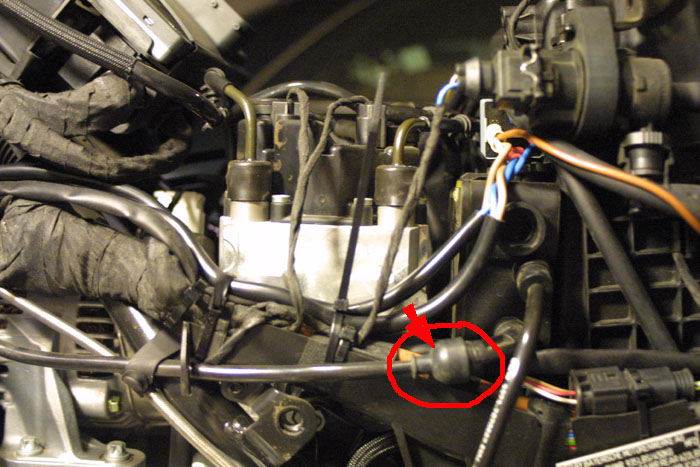
kit. Here are some picture of where the existing accessory plug
is located.
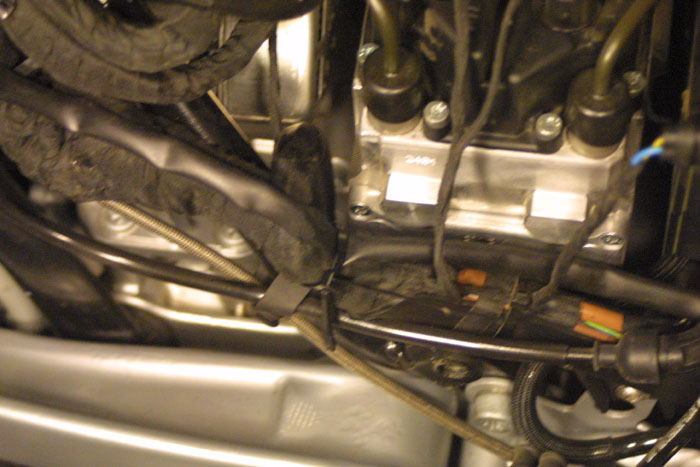
The plug connector is right underneath where the red arrow is pointing.
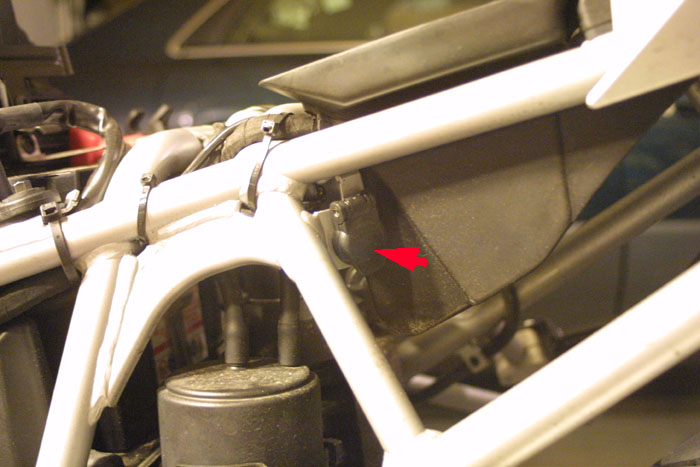
You have an idea of where this is located from the big fat charcoal
cannister.
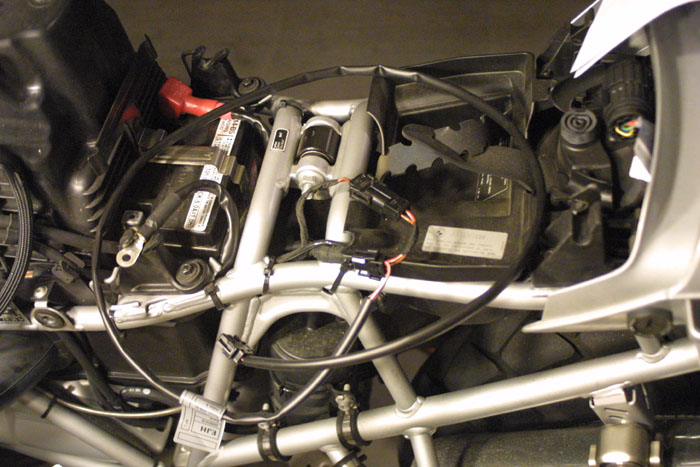
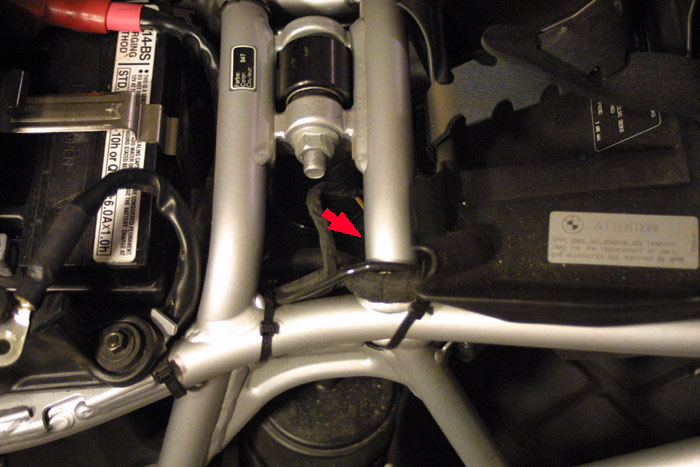
Here is the accessory plug cable attached to the accessory plug connect
toward the back of the bike.
You're essentially splicing into the existing accessory plug connector
and extending the accessory cable.
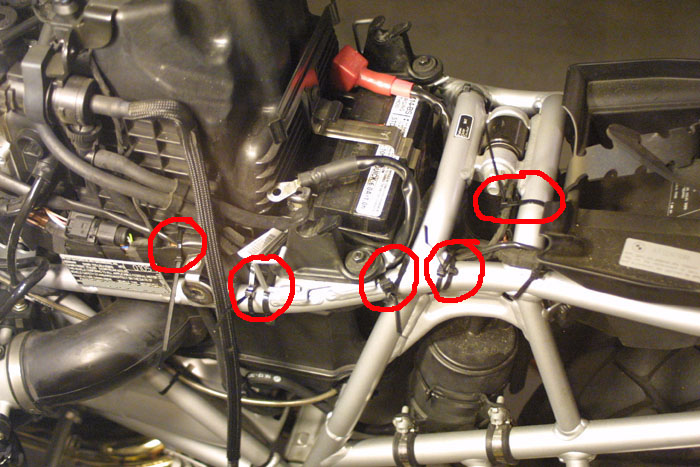
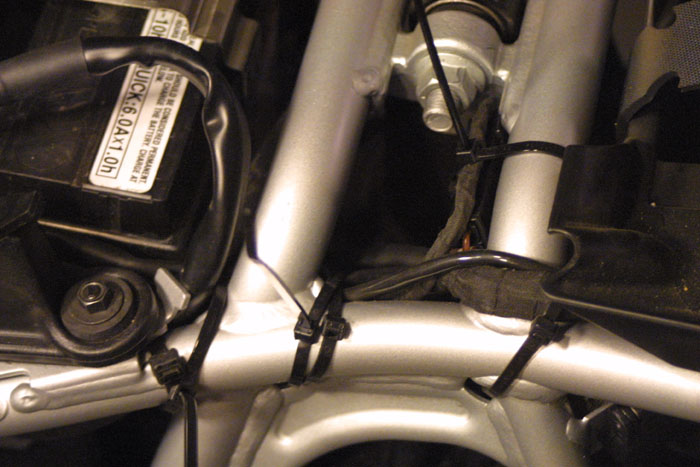
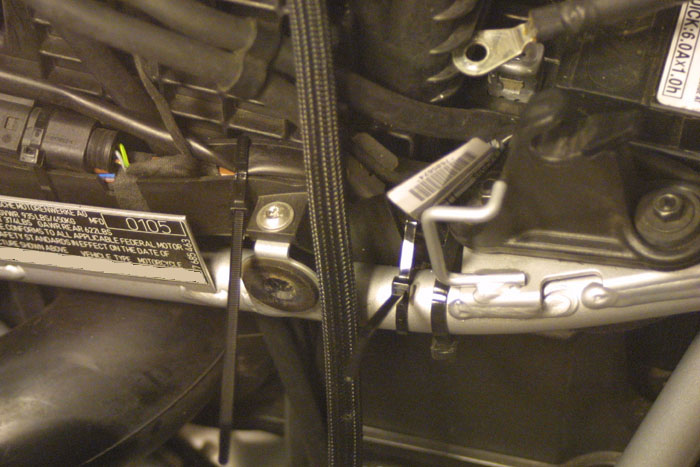
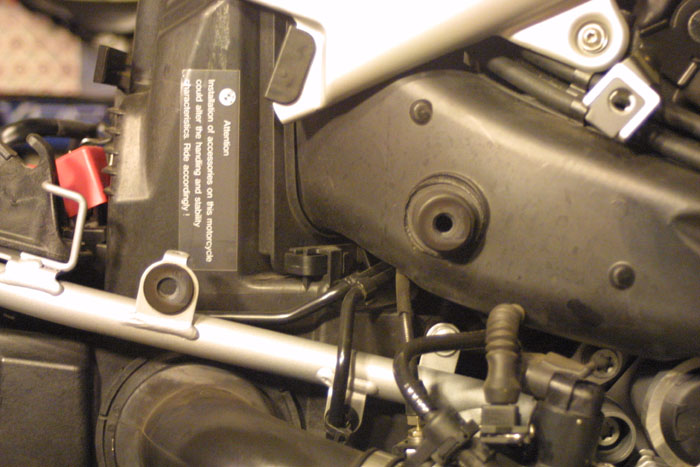
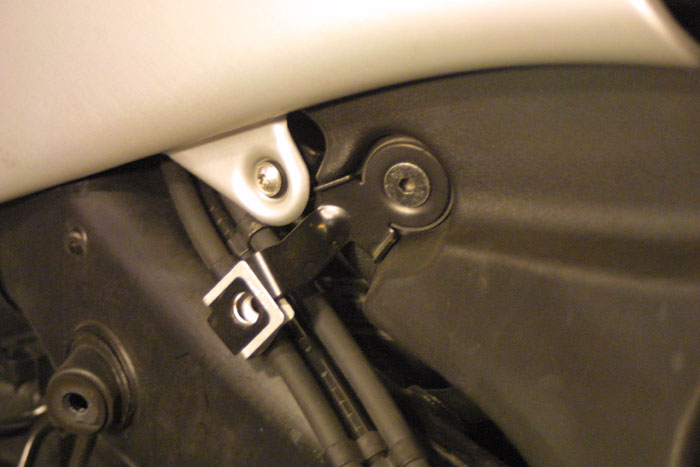
Routing the cable to the front is a bit of a pain. You want to
avoid running the cable on the outside of the bike frame and will want
to follow existing cables and cable trays to keep things nice and
neat. You can see all the zip ties that are used to keep the
cable in place. All the zip ties that haven't been trimmed are
the ones I put in place. It gives you an idea of where to route
the cable. BTW, it looks a lot worse than it really is.
Here is a closer look at all the zip ties.
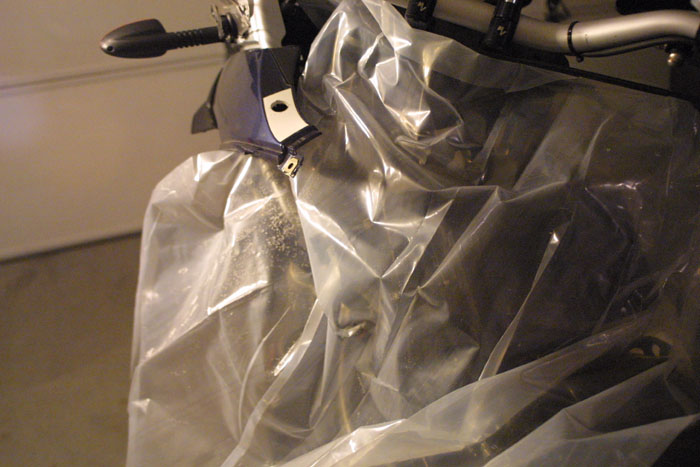
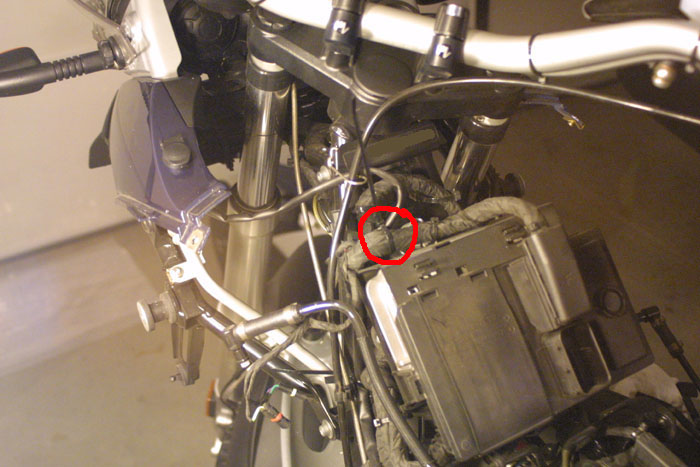
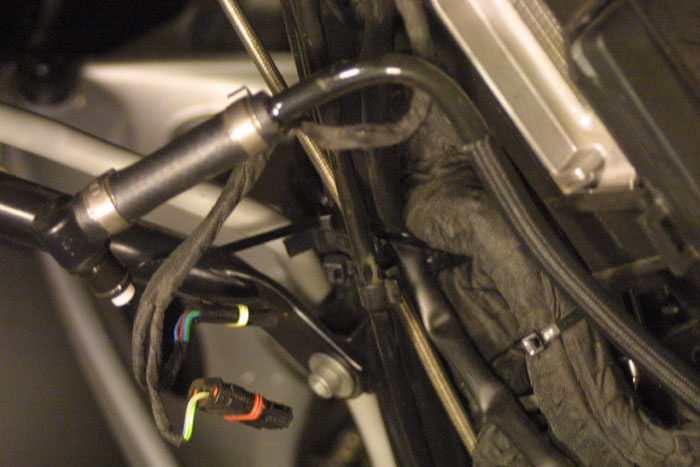
Of course the last thing to do is to connect the cable to the accessory
plug at the front.
If all you're doing is installing the BMW Accessory Plug Kit, you're
done. All you have to do now is reverse the steps taken to remove
the gas tank and you now have a GS with an accessory plug at the
front. This will be good for the navigation system, or whatever
else you want to run off of the bike's power.
*** WARNING ***
The throttle cable doesn't have a lot of slack to it. Make sure
it's free of obstruction and can move easily when the handle bar is
push to its limits towards the left and right. Also, you'll want
to make sure the throttle connector at the engine end is not loose and
is solidly attached. If the cable appears a little loose, push
the rubber cover up the throttle cable to expose the throttle cable
connector and push the connector into it's housing. If you hear a
click, it's secure and you can push the rubber cover back on. You
will also want to verify this end of the connector didn't come loose
once the tank is on and bolted to the chassis. There's nothing
like having your engine rev as you make an extreme turn to the
left.
Again, I recommend you double, triple, if not quadruple check to make
sure the throttle cable is free of obstructions when the tank is back
on.
If you're looking at this information to install a Wunderlich flood
light kit, you need to go to the next page (Page
3) to complete your Wunderlich light kit installation.
As for me, yes ... I'm off to see the wizard of OZ (installing the
Wunderlich flood light kit) so I can have a brighter
future at night. Off to page 3 I go.
Page 1, Page 3
Written on: Dec 23, 2005
Last updated: Jan 4, 2006